Manage existing analysis nodes
Overview
An analysis node is the “analysis engine service” that is responsible for analyzing your application - see CAST Imaging components: an overview for more details. The analysis-node can be scaled horizontally: install multiple analysis nodes to the same imaging-services instance to run analyses in parallel across multiple applications.
To manage analysis nodes from the UI, use the Applications > View Details option:
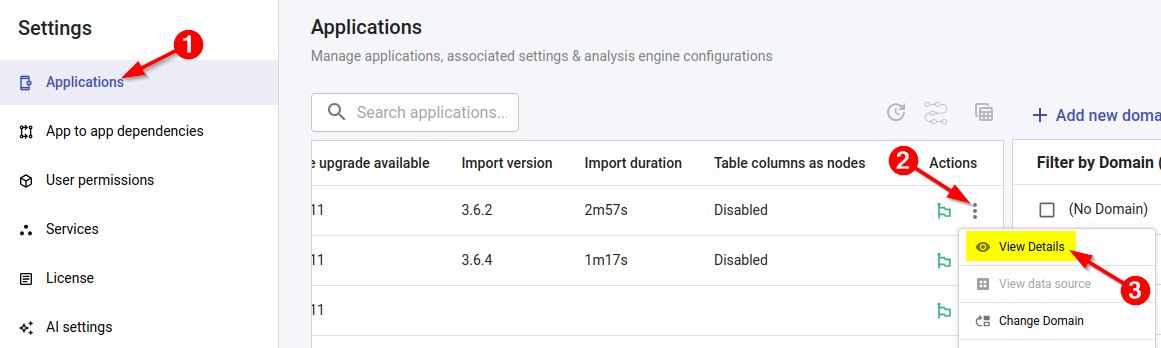
Default behavior for analysis nodes
CAST Imaging will automatically function as follows:
With one single analysis node per installation
- CAST Imaging will always use this analysis node for all analysis workload jobs.
With multiple analysis nodes per installation
- Applications are not tied to a specific node
- Analysis nodes are considered to be stateless
- CAST Imaging will automatically operate in load-balancing mode where analysis nodes are chosen from the pool of available analysis nodes to perform the next job in this order:
- the analysis node running the most recent release of CAST Imaging Core will be chosen first, above all others
- if all analysis nodes are running the same release of CAST Imaging Core, then the least used analysis node instance is selected
- therefore, by default, this section will display Any as follows, indicating that any analysis node can be used to process the application, provided that the release of CAST Imaging Core running on the analysis node is equal to the release of CAST Imaging Core used for your application for previous actions:
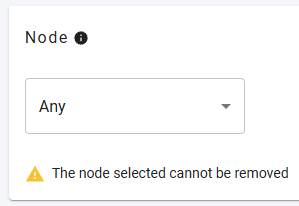
How do I set a specific analysis node for my application?
If you need to set a specific analysis node for your application (for example where your application requires specific configuration, such as RAM or CPU), use the drop down list to select the analysis node and override the default behavior:
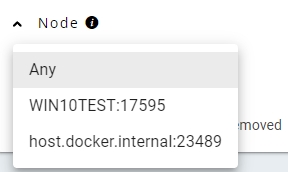
- CAST Imaging will ONLY offer analysis nodes running the same release of CAST Imaging Core used for your application for previous actions: analysis nodes running older releases of CAST Imaging Core will not be offered for selection.
- When you select a specific analysis node it is not possible to change the analysis node again in the future. This is to ensure result consistency.
Why can’t I select a different analysis node?
If you have multiple analysis nodes but you cannot select a different one using this drop down list (i.e. it is disabled), this means that a dedicated analysis node has already been set in the Overview page under the Advanced Platform Configuration section. In this situation, the analysis node that has been selected will be displayed:
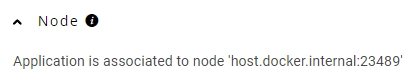
Technical information about multiple analysis nodes
CAST Imaging routes job requests at the moment the job is submitted - it does not queue it and re-assign it later when a new analysis node comes online.
For example if Node 1 is busy when a new job request arrives, CAST Imaging will still send it to Node 1 immediately. When Node 2 comes online shortly after, the analysis node will be available for the next request, not the one already running on Node 1.
How analysis nodes are discovered
When an analysis node starts up, it registers itself with Eureka (the internal service registry). CAST Imaging checks Eureka every 15 seconds to refresh its list of available analysis nodes. In other words a brand-new analysis node becomes visible to CAST Imaging within 15 seconds of it registering.
What happens in the auto-scale scenario
- If the job request has not been sent yet: once the new node registers, the next submission will see it and CAST Imaging can route to it.
- If the request has already been sent and accepted (job ID returned): it’s already locked to an analysis-node. The new analysis node coming online has no effect on it.
- If all analysis nodes are busy when the request arrives: CAST Imaging still picks the least-busy node immediately and sends it there. It does not wait for a free slot or a new analysis node.