Move an application to another environment
Overview
This page explains how to move a complete onboarded application from one CAST Imaging environment to another using the UI. Two options are involved:
- Exports, in the View Details panel of the source environment, produces a single export file containing everything the application needs.
- Add an application, on the landing page of the target environment, imports that file.
The imported application is a fully functional managed application: its analysis configuration, delivery folder, extensions, and results all move with it, so it can be re-scanned in the target environment.
How is this different from importing an application view?
CAST Imaging offers two ways to move application data between instances. They serve different purposes:
| Export and import applications | Move an application (this page) | |
|---|---|---|
| What moves | The application’s Neo4j graph, in other words the imaging-viewer analysis results |
The complete application, including its configuration, delivery folder, extensions, and results |
| Export file | .zip |
.imagingexport |
| How it is triggered | The export/import API, or the exportimport command line tool |
The UI, in both the source and target environments |
| Result in the target environment | A results-only application. Analysis cannot be configured and the application cannot be re-scanned | A managed application that can be configured and re-scanned |
| Intended for | Making results available to end users in a viewer-only deployment | Moving a working application between environments, for example from a test environment to production |
Use the option on this page when you need the application itself. Use the standalone viewer workflow when you only need to publish results to a viewer-only instance.
Before you start
| Requirement | Detail |
|---|---|
| CAST Imaging release | The source and target environments must both run the same release, e.g. 3.6.6-funcrel. Importing an export produced by a different release is not currently supported. |
| Deployment | Windows and Docker, in any combination. See Supported scenarios. |
| Application type | Managed applications (not applications where only the results have been imported). |
| Component release constraint | Every component release in the export, including CAST Imaging Core, must be present in the target environment at the same version. See Why was my import aborted?. |
| Role | The Admin profile, or a custom profile with the Administrator role, is required to import. See User permissions. |
Supported scenarios
Within the component release constraint described in the table above, these deployment combinations are supported:
| Source environment | Target environment | Supported? |
|---|---|---|
| Windows | Windows | ✅ |
| Windows | Docker | ✅ |
| Docker | Windows | ✅ |
| Docker | Docker | ✅ |
In addition:
- Domain and tenant synchronization is supported: where domain and tenant mapping is in use, the imported application is synchronized with the corresponding tenant in the target environment.
What is not supported
- Podman and Kubernetes deployments cannot be used as either the source or the target.
- Applications delivered from a source folder location. The export process packages the source code that CAST Imaging manages itself (i.e. delivered via a ZIP archive file). Source code held in an external folder is outside the export and does not move with the application.
- Migration from CAST Imaging v2 to v3. This feature moves applications between two v3 environments. To move from v2, use Migrate from v2 instead.
- Automation. There is no public API or command line interface for exporting or importing an application, and the feature is not covered by the existing automation tooling. Both the export and the import must be run from the UI. See Automation for the operations that can be automated.
What is included in the export
The export file contains the following:
- Application data: all application data from
common-data/shared, the delivery folder, and the application schemas (_local,_central,_mngt) - Logs:
castms-logs - Database export: all application data held in the
control_panelschema, exported as JSON files - Imaging components: the Neo4j export (i.e. the results) for the application
- Architecture Models: Architecture Model files attached to the application but not yet installed
- Configuration and extensions: DLM files, classpath files, blackbox files, custom extensions, and global configuration details
- Snapshots: since the
_centralschema is included, application snapshots are also stored in the export
Step 1 - Run the export
Perform these steps in the environment that currently holds the application.
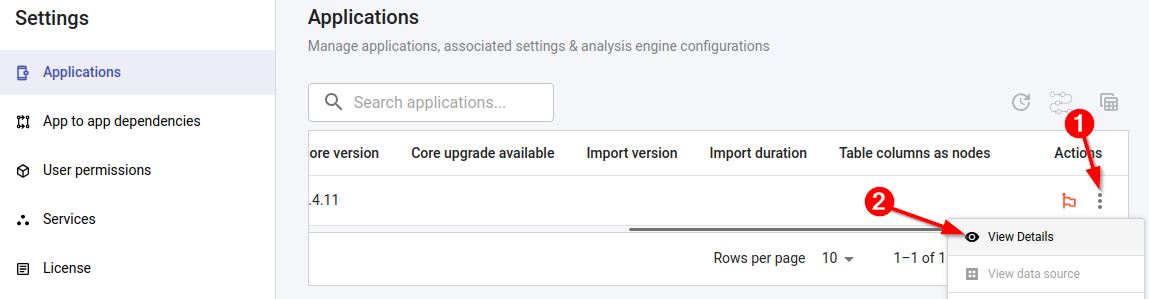
- Open the Applications list and select your application.
- Use the Actions menu and choose View Details. See The Applications panel.
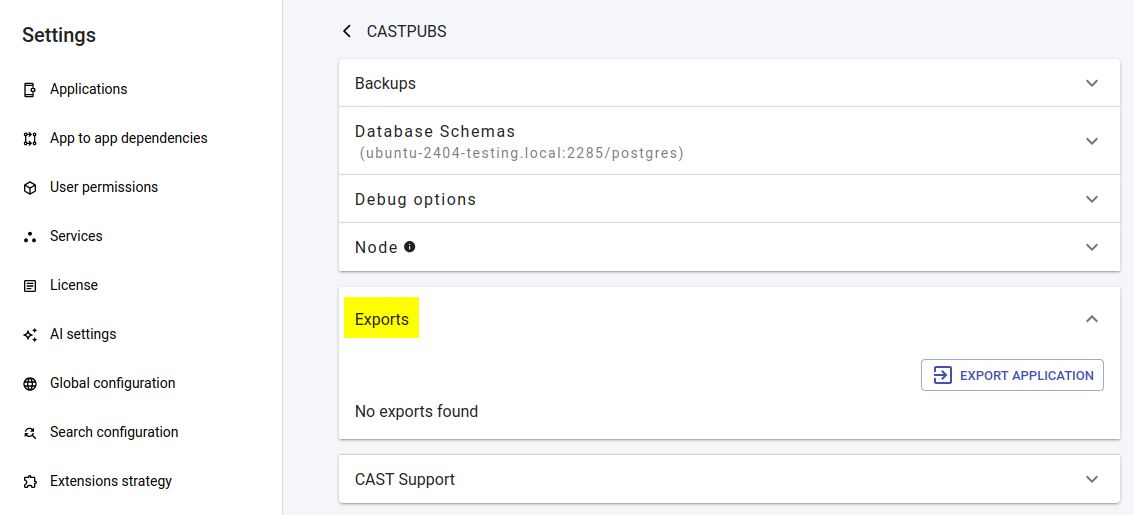
- Expand the Exports section.
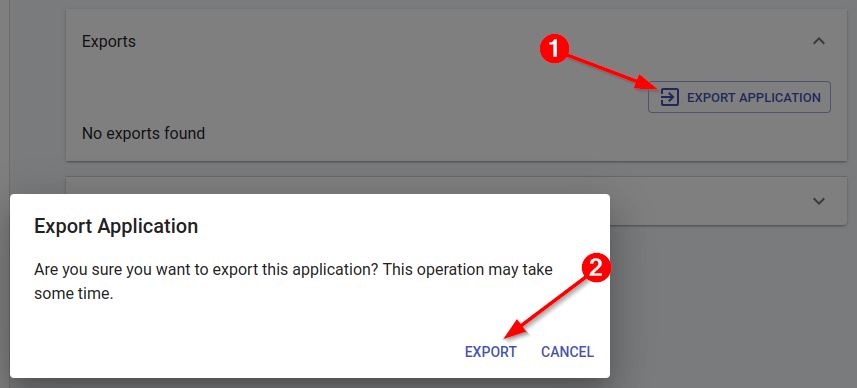
- Click Export application and confirm. The export may take some time to complete.
Step 2 - Monitor the export
The export runs as a job. Its progress and any errors are recorded in the application logs, alongside the other jobs run for the application. See Logs page for more about accessing job logs.
Step 3 - Download the export file
When the export completes, it is listed in the Exports section with its date and size. Entries are named using this pattern:
{appName}_yyyy-MM-dd-HH-mm-ss
Use the download icon to retrieve the export, then transfer it to the machine from which you will run the import. The downloaded file carries the .imagingexport extension, for example:
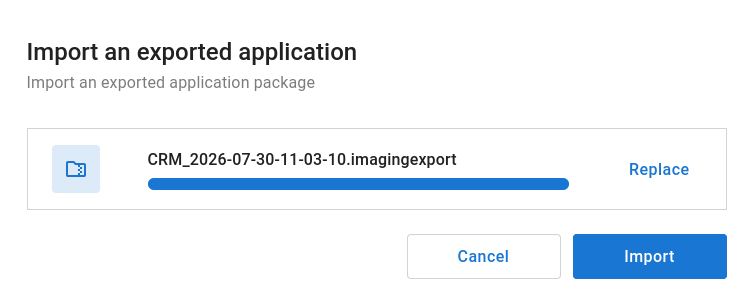
CRM_2026-07-30-11-03-10.imagingexport
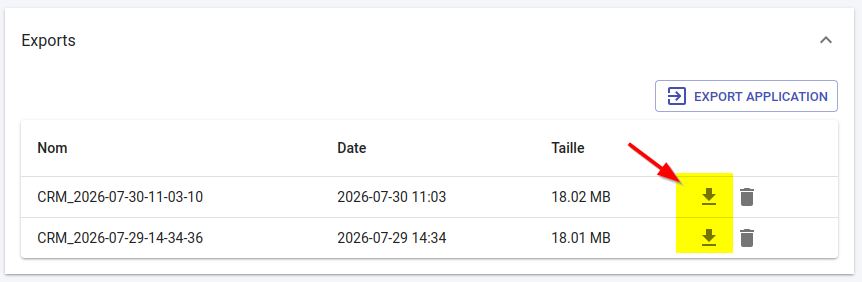
Exports are retained until you remove them. Use the delete icon to delete an export you no longer need and reclaim the disk space it occupies.
Step 4 - Start the import
Perform these steps in the target environment.
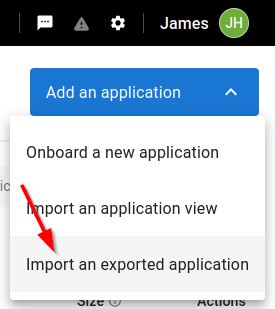
- Open the CAST Imaging landing page and click Add an application.
- Select Import an exported application.
- Select the
.imagingexportfile produced in Step 3, then click Import. Where at least one domain has been created in the target environment, you can also assign the application to a domain. The domain option is not displayed when no domains exist.
Step 5 - Complete the import
CAST Imaging checks the contents of the export against the target environment. When the import is complete, the application then appears on the landing page of the target environment, with its analysis configuration available. See Application landing page for an explanation of the application statuses shown while the import runs.
Why was my import aborted?
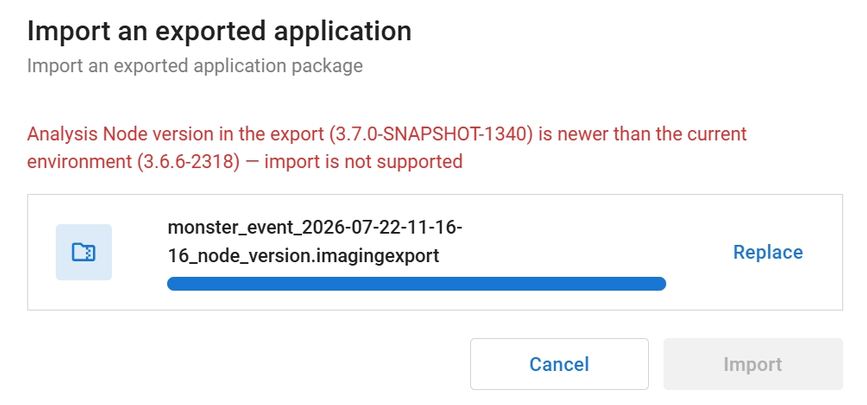
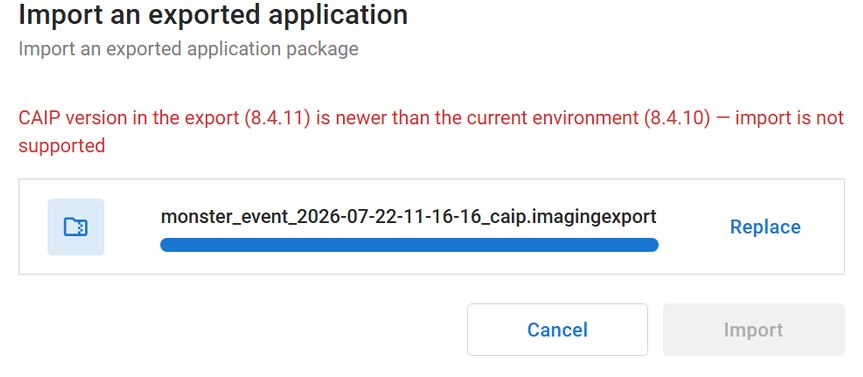
When you select an export file, CAST Imaging compares the component versions it contains against those installed in the target environment. If any component in the export is newer than the version installed locally, the reason is displayed in the dialog and the Import button remains disabled.
This check covers the Analysis Node version:
It also covers the CAST Imaging Core (CAIP) version:
To resolve this, update the target environment so that every component is at the same version or higher than in the source environment, then select the file again. See Update CAST Imaging.
Imports are also rejected when the export does not meet the conditions listed in Before you start and Supported scenarios, in other words when the export comes from a different release, from an unsupported deployment, or from an application that is not a managed application.
Related information
- Export and import applications - move analysis results only, for viewer-only deployments
- Managing application backups - roll an application back to an earlier state in the same environment