Create custom aggregations
Overview
When consulting your results you can choose how your application is displayed using one of the default “perspectives/aggregation modes” available out of the box (depending on the perimeter/scope you choose) - these default modes are explained in User Interface Reference:
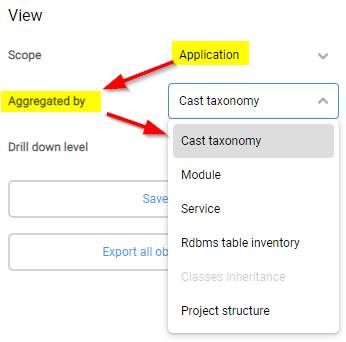
However, you may find that these default modes do not meet your requirements for displaying your application data. If so, you can create your own custom aggregation mode and display your objects as you have designed.
How does it work?
An aggregation is essentially a method of grouping specific items together, therefore the creation of a custom aggregation involves creating custom nodes that group together specific object types (or a mix of object types). When you choose to display your application using the custom aggregation mode, the items in your application are grouped into the custom nodes defined in your custom aggregation.
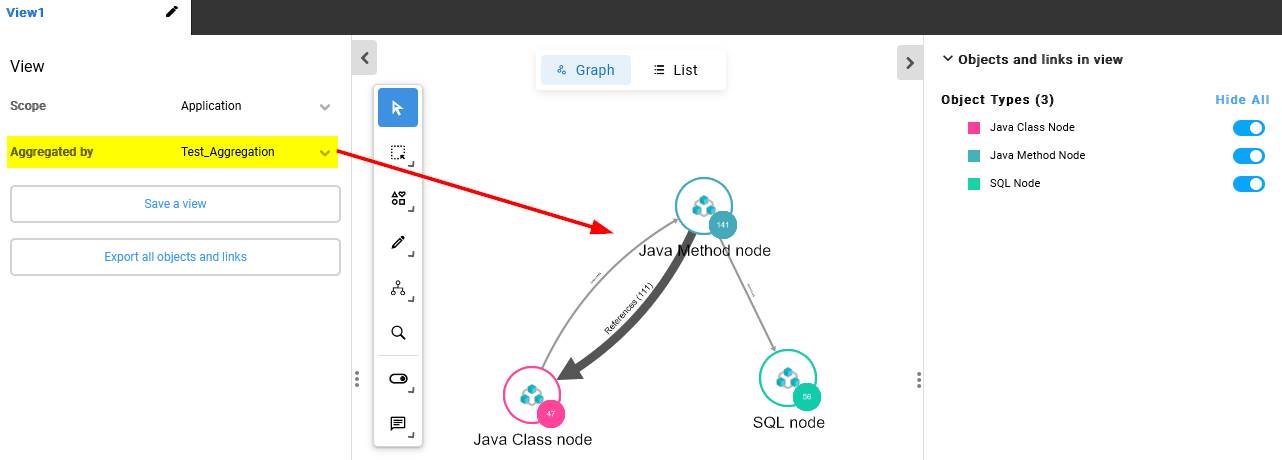
For example a custom aggregation has been created containing three custom nodes:
- Java classes
- Java methods
- SQL objects (any type)
This aggregation has then been applied to this example and simple client/server Java/SQL application:
Two ways to create a custom aggregation
When you create a custom aggregation you can choose between two creation modes, which differ in how the links between your custom nodes are handled:
- Map the real architecture - CAST Imaging calculates and draws the actual dependencies between your custom nodes for you, based on the relationships found in the code. This is the behaviour described throughout this page and the only behaviour available in previous releases. Use this mode to understand and document how the system is built today.
- Define & validate your target architecture - no links are calculated for you. Instead you draw the links you allow between your custom nodes, then validate the aggregation to compare your design against the code: allowed links are shown in green and violations in red. Use this mode when you have a target architecture in mind and want to find out where reality diverges from it.
Both modes use the same process for creating nodes, publishing, sharing and editing - see Step-by-step instructions below. The differences are described in Step 1, Step 2b and Step 2c.
Dynamic custom aggregations
Custom aggregations are dynamic - this means that the objects they display will automatically update when the application is re-analyzed and new objects are identified. For example, if the custom aggregation contains a custom node that captures Java Methods and the application is re-analyzed and new Java Methods are identified, then these objects will be automatically displayed in the custom aggregation. This behaviour was not present in previous releases (i.e. the custom aggregation remained static and was never updated with new objects identified in a new analysis).
Things to know about custom aggregations
- Custom aggregations are application specific. In other words, a custom aggregation will only be available for the specific application it was created in.
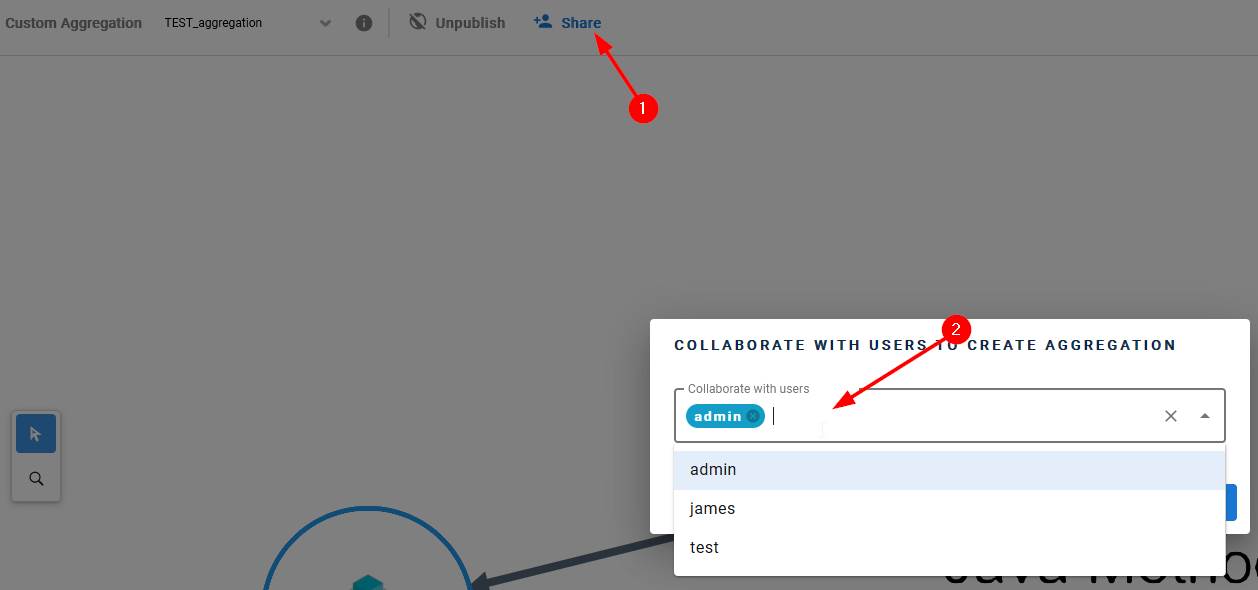
- Any user that has permission to view results in the application the custom aggregation was created in will be able to use the custom aggregation by default as soon as it is published, however, by default only the user that created the custom aggregation will be able to modify it. Edit access can be granted to additional users/groups using the Share button.
-
Available in ≥ 3.6.6-funcrelA custom aggregation created using the Define & validate your target architecture creation mode cannot be published until it has been validated. If you close the aggregation before publishing it, the authorization links you have drawn are retained when you reopen it, but the links found in the code are not redisplayed - you will need to validate the aggregation again.
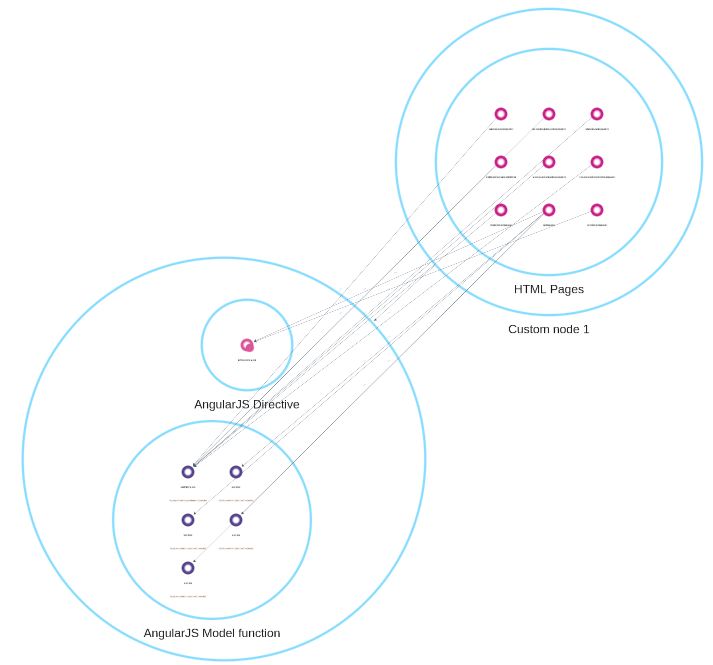
- When using a published custom aggregation, drilling down on a link between aggregated nodes, CAST Imaging will visually group resulting objects to show which aggregated node they belong to:
- Drill-down objects are grouped visually so users can easily distinguish objects from Custom Node A versus Custom Node B.
- Group names or labels indicate the parent aggregated node.
Step-by-step instructions
Step 1 - Create the custom aggregation
First ensure you are viewing the application you want to create the custom aggregation mode for, then click the dedicated icon in the header bar:

Then enter a name for the new custom aggregation: this name will be displayed in the left panel and publicly identifies it.
You are then asked to pick a starting point: choose the creation mode you want to use and click Continue:
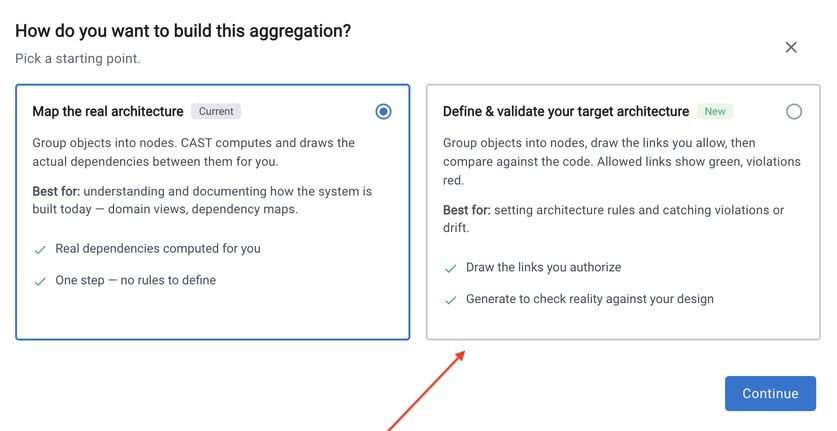
- Map the real architecture - continue at Step 2 and work through the remaining steps as described below.
- Define & validate your target architecture - continue at Step 2 to add your custom nodes, then complete Step 2b and Step 2c before publishing.
When the aggregation has been created, you can then start adding your custom nodes.
Step 2 - Adding custom nodes
To add a custom node, click either of the Custom object icons:
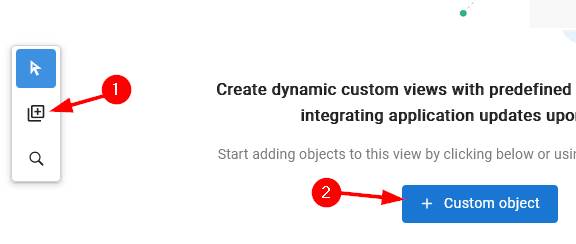
A window will open displaying a list of all the objects in your application: use the filter options at the top of the screen to find the objects that you want to group in the custom node:

In this example we want the node to contain only Java Method object types, so we can use the Object type filter:
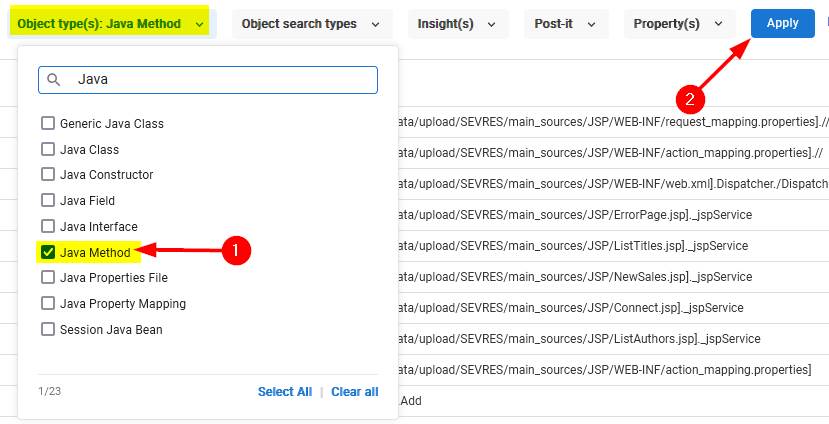
Instead of building the filter yourself, you can select the AI Mode tab and describe the objects you want in plain English - see Define objects with AI Mode.
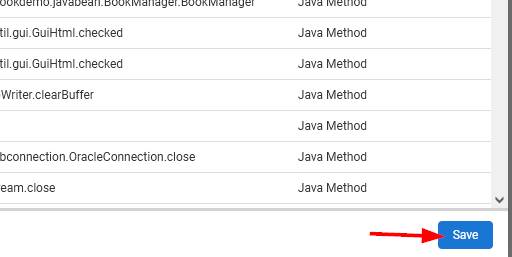
Click Save in the bottom right corner of the window to ensure the choice is applied and choose a name for the custom node:
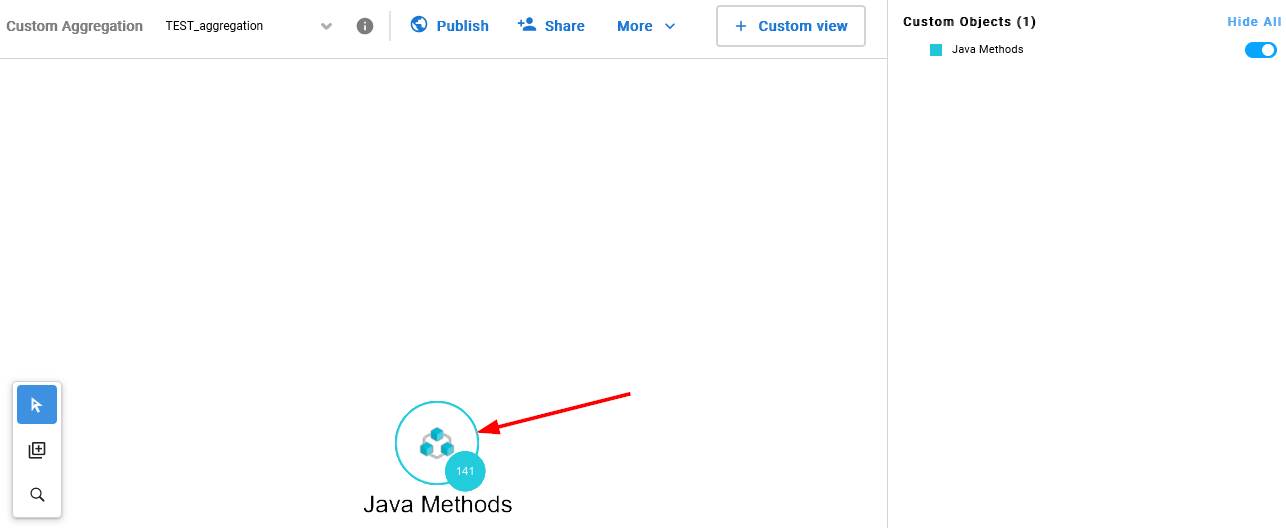
The new custom node is then displayed:
Repeat this process until you have added all the custom nodes you require.
You can also clone any custom nodes you have added, to help speed up the configuration process - right click the custom node and select Clone:
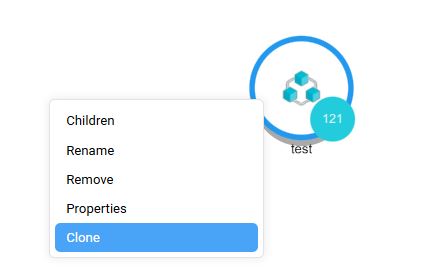
Cloning is only available in unpublished aggregations.
Any links between nodes will be displayed as shown in the example below:
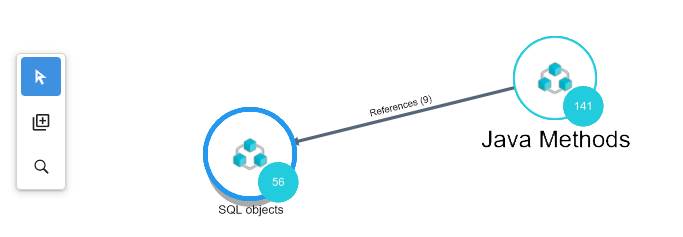
This applies to the Map the real architecture creation mode only. If you are using the Define & validate your target architecture mode, no links are drawn between your custom nodes at this point - see Step 2b.
Your custom nodes will not necessarily cover every object in your application - to find out what has been left out, see Step 2d. You can also change what the canvas shows while you work - see Canvas display options.
Step 2a - Adding Tags/Post-its to custom nodes
Tags/Post-its can be added to any custom node using the toolbar within the custom aggregation editor. Added Tags/Post-Its persist after the aggregation is saved and will appear in search and filter options where applicable.
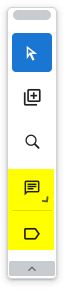
Tags and Post-Its associated with custom nodes are only available in search if the custom aggregation has been published.
Step 2b - Add the authorization links
This step applies only to custom aggregations created using the Define & validate your target architecture creation mode.
In this mode, CAST Imaging does not calculate or display any links between your custom nodes when you add them: the aggregation deliberately shows the nodes on their own, so that you can state the design you expect before comparing it against the code.
Enable the Add authorization links toggle, then draw a link between two custom nodes to declare it. Each link you draw is an authorization link - a relationship that your target architecture allows:
- you can define as many authorization links as you need, but only one link between any given pair of custom nodes
- an authorization link describes your intended design rather than something found in the code, therefore it cannot be drilled down into
- an authorization link can be removed if you change your mind
Step 2c - Validate the aggregation
This step applies only to custom aggregations created using the Define & validate your target architecture creation mode, and follows on from the authorization links you defined in Step 2b.
When you have drawn all your authorization links, click Validate Aggregation. CAST Imaging then compares the relationships found in the code against the links you have authorized. You cannot publish the aggregation until this has been done - until then the Publish option is disabled and displays the message Validate the aggregation before publishing:
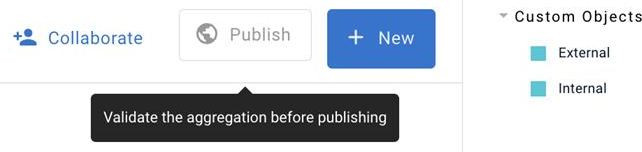
The result of the validation is displayed using colour, and the Link Types section of the right panel explains what each colour means:
- Allowed - shown in green. A link exists in the code between two custom nodes and it complies with the rules you defined, in other words it matches one of your authorization links. This relationship is expected as per your design.
- Violation - shown in red. A link exists in the code between two custom nodes but it breaks a rule you defined, in other words no authorization link has been defined for it. Violations are grouped as escalated links.
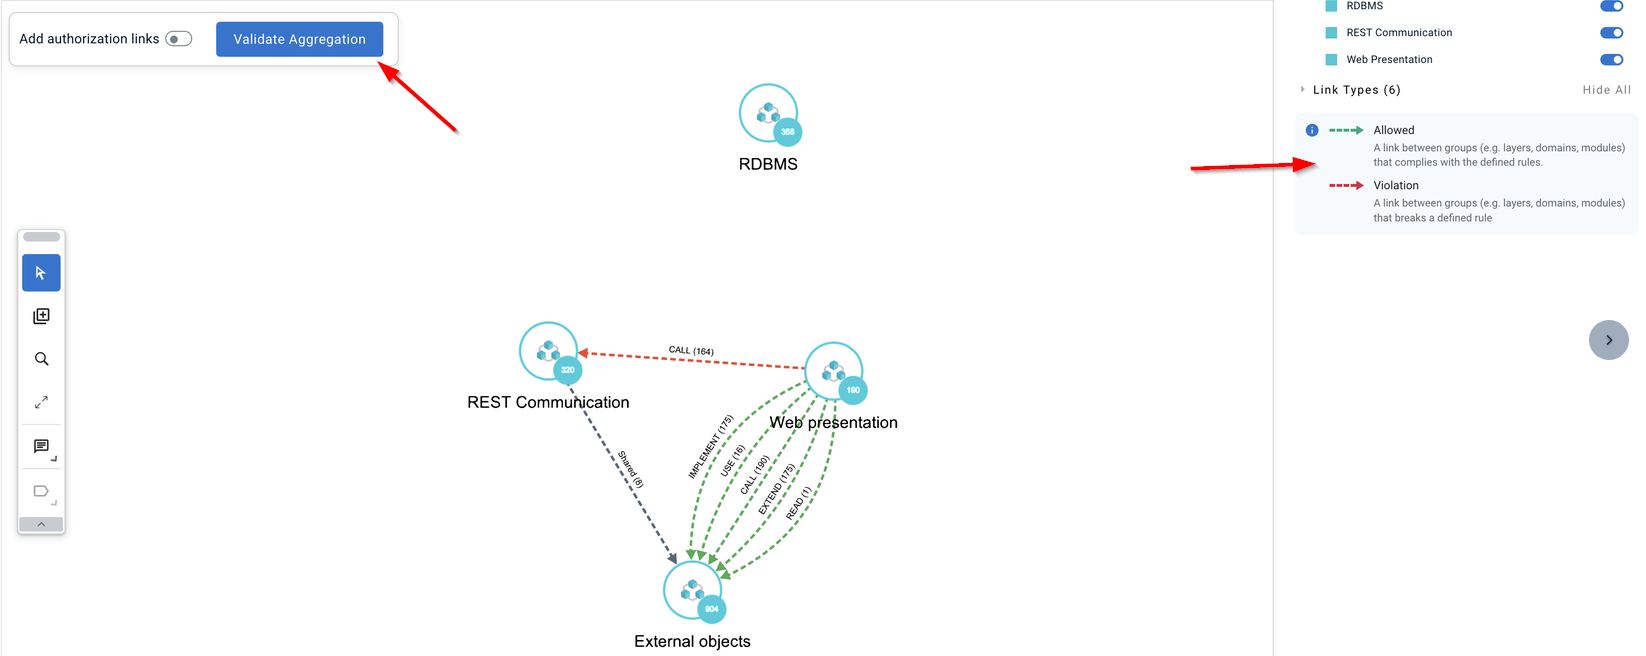
Both types of link can be ungrouped or drilled down into to see the underlying object level links they represent.
Two further points to be aware of:
- shared links are excluded from the validation checks and continue to be displayed as normal links.
- while the aggregation remains unpublished, you can add further authorization links and validate it again.
When you publish the aggregation, all objects and links are displayed as they are in build mode, including the colour coding. The exception is shared links, which continue to appear in build mode only.
Step 2d - Show the objects that are not covered by a custom node
This step is optional and applies to both creation modes.
The custom nodes you define will not necessarily cover every object in your application: any object that does not match one of your nodes is absent from the aggregation, therefore the view is an incomplete representation of your application. To see what has been left out, enable the Unassigned toggle in the canvas toolbar:
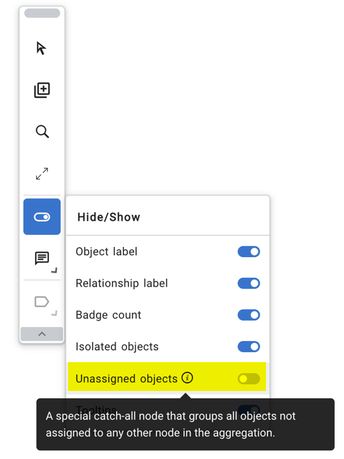
A special Unassigned node is then added to the canvas grouping together all the objects that are not covered by any of your custom nodes, and its badge displays the number of objects it contains. The node is displayed in grey so that you can distinguish it from your own custom nodes:
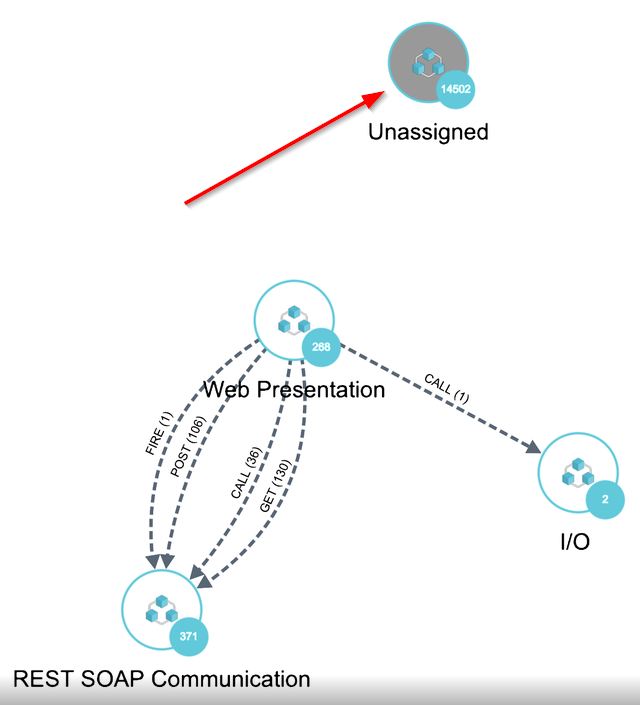
The toggle is disabled by default. Disabling it again removes the node from the canvas - the objects it represents are then no longer displayed.
The Unassigned node behaves differently to the custom nodes you create yourself:
- it is a read-only node: it cannot be renamed or cloned. Unassigned is a reserved name, therefore you cannot use it for one of your own custom nodes either
- its contents are recalculated automatically whenever you add or remove a custom node, so the object count always reflects the nodes that are currently defined
- no links are calculated between the Unassigned node and your custom nodes
- in the Define & validate your target architecture creation mode, authorization links cannot be drawn to or from the Unassigned node
To see which objects the node contains, double click it: the canvas switches to list mode showing only the objects that are not covered by a custom node. When the node contains a large number of objects you are asked to confirm the action first, since displaying them all may take some time. Above 100,000 objects the node cannot be explored at all and the message Too many objects to explore - please create custom nodes to refine your view is displayed: add new custom nodes or widen the scope of your existing nodes to reduce the number of unassigned objects.
Whether the Unassigned node is included when you publish the aggregation depends on the state of the toggle at the moment you publish it - if the node is displayed on the canvas it is included in the published view, if it is hidden it is excluded. There is no separate publish option for the node.
Step 3 - Publish the custom aggregation
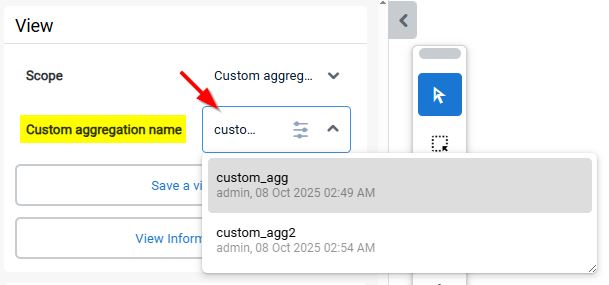
Before users can use the custom aggregation you will need to publish it:

This will make it available as a scope in the left-panel for all users that have permissions to view the application.
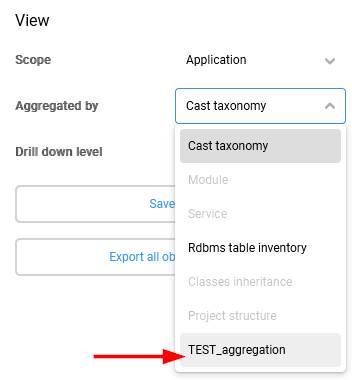
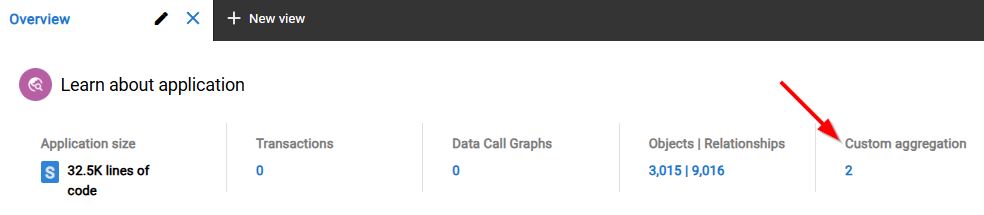
You can also access your custom aggregations direct from the Overview/Welcome page:
When a custom aggregation has been published, it is no longer possible to add new or edit/remove existing nodes within it. To do so, you should “unpublish” it (use the button in the header) first.
Step 4 - Share the custom aggregation
Initially the custom aggregation can only be edited by the user that created it. Therefore if you would like other users to be able to modify it, use the Collaborate button:
Step 5 - Editing/cloning existing custom aggregations
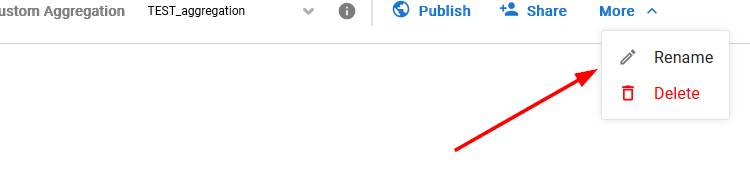
To edit an existing custom aggregation, ensure it is not in “published” mode:

You can:
- rename the custom aggregation
- delete the custom aggregation
- add new or remove/edit existing nodes
You can clone an existing custom aggregation to help speed up the process of creating a new one:
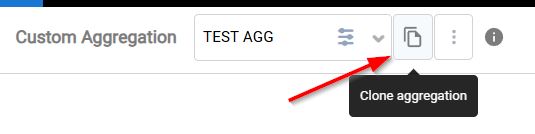
The new cloned aggregation will open in unpublished mode.
Canvas display options
While you are building a custom aggregation, the canvas toolbar provides a subset of the display options that are available when you are exploring your results (see Action options):
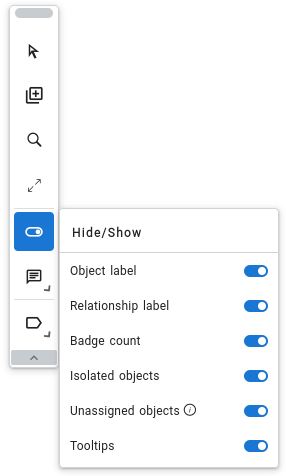
| Option | Description |
|---|---|
| Object label | Toggle the display of the custom node name |
| Relationship label | Toggle the display of the name of the link between two custom nodes |
| Badge count | Toggle the badge count - the small circle showing the number of objects a custom node contains |
| Isolated nodes | Toggle the display of custom nodes that are not linked to any other node |
| Unassigned objects | Toogle the display of unassigned objects |
| Tooltips | Toggle the short tooltip explanation that is displayed when you select an item on the canvas |
The toolbar also allows you to switch the canvas between the graph and the list representation of your aggregation, in the same way as in a published view. In list mode a label is displayed above the list, and the same switch returns you to graph mode. Double clicking the Unassigned node is a shortcut to list mode, pre-filtered on the objects that are not covered by a custom node.