Analysis configuration
Introduction
As explained in Prepare and deliver the source code, CAST Imaging extracts relevant information used to create the automated analysis configuration from the JEE project files. Currently the JEE Analayzer extension supports these build project files:
- Eclipse - all version greater than 3
- Maven - version 2 and 3
For any other build project format (e.g. Apache -ant) CAST Imaging will not be able to automatically retrieve build information: no Analysis Unit will be created and no analysis configuration will be provided. To address this situation, the Analysis Unit and the analysis configuration should be created manually. This case falls outside of the out-of-the-box support and is out of scope of a standard analysis.
Using CAST Imaging Console
Starting 3.6.0-funcrel, analysis configuration settings are available after an onboarding/fast-scan and before the initial analysis. For all other releases, analysis configuration options are only exposed after an initial analysis.
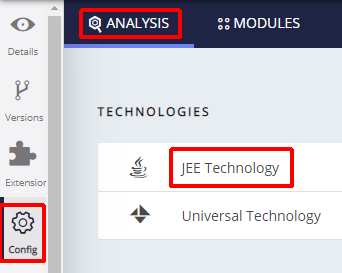
Technology settings are organized as follows:
- Settings specific to the technology for the entire Application (i.e. all Analysis Units)
- List of Analysis Units (a set of source code files to analyze)
created for the Application
- Settings specific to each Analysis Unit (typically the settings are the same or similar as at Application level) that allow you to make fine-grained configuration changes.
Settings are initially set according to the information discovered during the source code discovery process when creating a version. You should check that these auto-determined settings are as required and that at least one Analysis Unit exists for the specific technology.
Technology and Analysis Unit settings
Notes on Technology and Analysis Unit settings:
| Technology |
|
| Analysis Unit |
|
Technology level settings

Classpath
Classpaths are automatically discovered by CAST through the inspection of the project files. If the project files are missing or if you receive alerts, Classpaths can be added manually at Technology level (i.e. for all Analysis Units) and can be discovered via manual inspection of the delivered source code or by inquiring with the Application Team.
The analyzer uses the Classpath information to search for external classes that are referenced in project code but not defined in your source code files. Classpath entries can be either a file (archive file such as a JAR) or a folder. When analyzing a folder, the analyzer assumes that classes are correctly deployed on disk and that they respect the naming convention where a package maps to a folder and a class maps to a file.
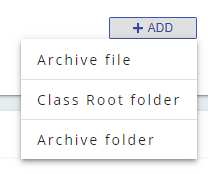
If you need to add additional Classpaths, use the Add button to define your class path files (typically an archive file) or folders. You will be prompted to select the type you want to add:
| Option | Description |
|---|---|
| Add New Archive File | If the project uses external classes packaged in a single JAR file, use this option to define the location of a single JAR file. You can define multiple JAR files as separate entries, although consider using the Archive Folder option if the project uses multiple JAR files. |
| Class Root Folder | If the project uses external classes defined in .class files, use this option to define the location of the root folder. You can define multiple Class Root Folders. All .class files in the folder and any sub folders will be taken into account (if the Recursive option is enabled) .java and .XML files are ignored. |
| Archive Folder | If the project uses external classes packaged in multiple JAR files, use this option to define the location of the folder containing the JAR files. You can also define multiple Archive Folders. All JAR files in the folder and any sub folders (if the Recursive option is enabled) will be taken into account. |
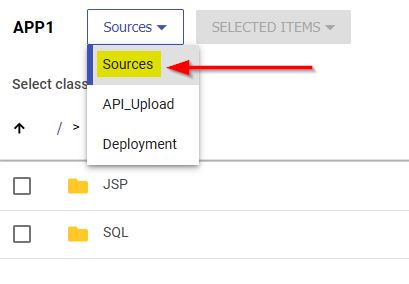
All three options will open the web interface to allow you to choose the items you require for your classpath. You can choose from one of the following:
- Sources
- API_Upload
- Deployment
Sources option
If you are using CAST Imaging v3.5.4-funcrel or later and have onboarded your application from a source code folder (not a ZIP file) then the screen will open on the source code folder location, allowing you to select the files/folders you need:
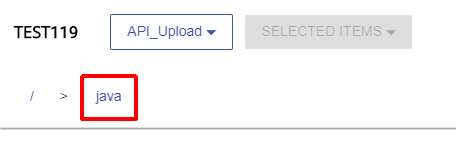
API_Upload and Deployment options
If you are:
- using CAST Imaging v2 or CAST Imaging v3.5.3-funcrel or earlier
- using CAST Imaging v3.5.3-funcrel or later and have onboarded your application from a ZIP file (not a source code folder location)
…then the screen will open on the API_Upload option:
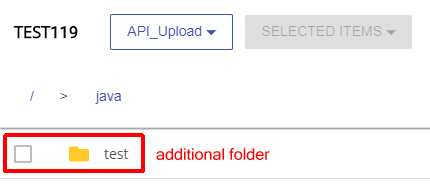
Use the green buttons in the bottom right corner to add the required items - doing so will add the items to the storage location and they can be re-used for other Applications if necessary:
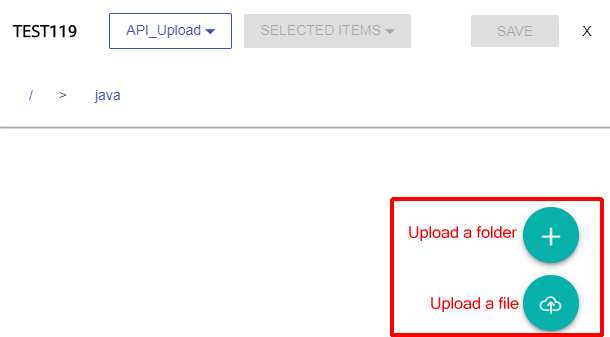
- use the Upload a folder icon to create a folder in the root
location into which you can then add your
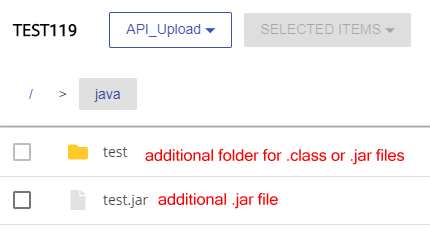
.classor.jarfiles using the Upload a file icon:
- use the Upload a file icon to upload a specific file into the current folder:
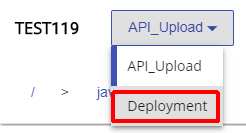
- Alternatively, if the
.jar/.classfile/folders have been delivered already but are not found (for example you have an alert stating a missing file) then you can select the files from the delivered source code using the Deployment option in the drop down. Then drill down to the delivered source code:
When you have either uploaded the required files/folders or located them in the delivered source code, you need to select the required files/folder by placing a tick in the tick box and then clicking Save:
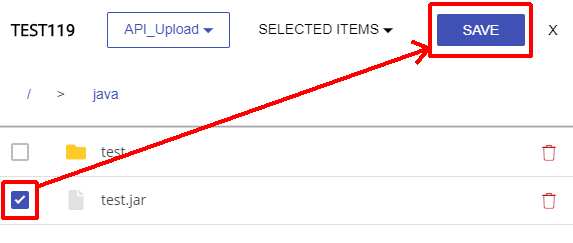
Selected class paths will be listed:
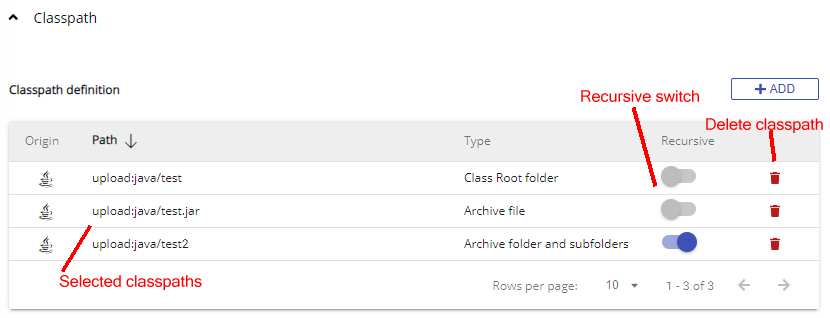
- If you define any JAR archives (individual archives or archives located in a folder), during the analysis the archive(s) will be unpacked in memory and analyzed.
- When defining a class path, instead of listing all the
subdirectories of package, it is more convenient to add the folder
that contains the package. For example: if a Java file contains:
import com.Pkg1.Pkg2.\*and these packages are located in the folder\<DIR\>/com/Pkg1/Pkg2, simply add the folder\<DIR\>to the class path.
Java / JEE versions
Click here to expand…
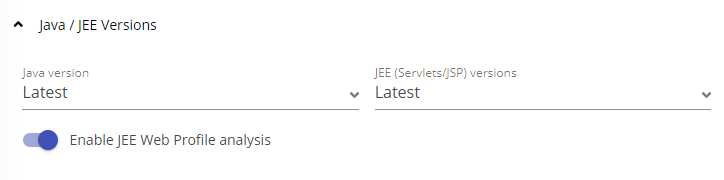
| Java version | The analyzer will assume that that latest version of the JDK has been used to compile the application source code. If your application source code does not use the latest JDK, you can override the selection by manually choosing a version in the drop down.
|
|||||||||||||||||||||
|---|---|---|---|---|---|---|---|---|---|---|---|---|---|---|---|---|---|---|---|---|---|---|
| JEE (Servlets/JSP) versions | The analyzer will assume that that latest Servlet/JSP version has been used to compile the application source code. Use the drop down list box to choose the correct option if your application source code uses an older version. It is possible to obtain the JSP version in use by opening the application's web.xml file and locating the DTD version used to define the servlet - this is the servlet version. The servlet version is 2.3 in the example below: Using this information, see the table below for equivalence:
|
|||||||||||||||||||||
| Enable JEE Web Profile Analysis | This section governs the settings that will be applied if your JEE project is defined as a web application:
Web Client Files The JEE Analyzer does not support the analysis of web client files such as *.HTML, *.CSS, *.JS. These files are handled by the HTML5 and JavaScript extension. |
Java Frameworks
Click here to expand…
For more information about frameworks see JEE - Framework analysis tips.
The Java Framework section governs the analysis settings used when a specific Java framework is present in your source code. These pre-defined settings are designed to address specific recurrent issues during analysis and correspond to default Environment Profiles. Each framework has an associated drop down list box with various options:
JPA (Hibernate), Struts and Spring
By default, the option for these Frameworks will be set to “Latest”. In other words, the analyzer always assumes that you are using the latest available release supported by the JEE analyzer extension. You can override the default setting if required:
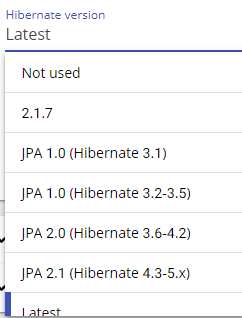
Note that when using JEE Analyzer ≥ 1.1.0, the Struts Version combo box has no impact: by default, all supported versions of Apache Struts are handled by default. The combo box will be removed in a future release.
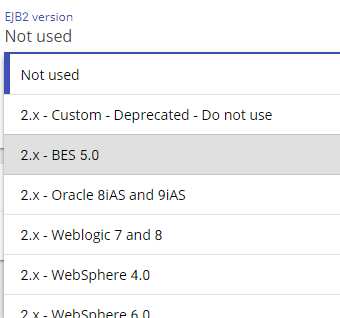
Web Service (WBS) Version and EJB2 (Enterprise Java Bean) Version
Auto discovery and configuration of Web Services (WBS Services) is supported and Enterprise Java Bean (EJB) is not supported. The AIP Super Operator will need to gather the required information from the application team or inspect the delivered source code to determine the proper configuration of these parameters. Then a decision will need to be made to select the correct version of each:
Web Services
|
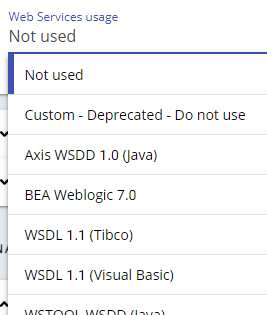
CAST AIP ≥ 8.3.6 Auto discovery and configuration of Web Services (WBS Services) is supported as follows:
CAST AIP ≤ 8.3.6 Auto discovery and configuration of Enterprise Java Bean (EJB) is not
supported. The AIP Super Operator will need to gather the required
information from the application team or inspect the delivered source
code to determine the proper configuration of these parameters. Then a
decision will need to be made to select the correct
version. |
|---|---|
EJB
|
Auto discovery and configuration of Enterprise Java Bean (EJB) is not supported. The AIP Super Operator will need to gather the required information from the application team or inspect the delivered source code to determine the proper configuration of these parameters. Then a decision will need to be made to select the correct version. |
Note:
- To find out if your application implements web services, simply search for files with the extension .wsdl or.wsd, or the files web-services.xml or webservices.xml in the source file directories. Usually, these files are located in the META-INF directory, but as the source folders do not always match the production folder tree, we recommend searching all the source files.
- If you explicitly select an EJB2 profile (see above) then all configuration regarding EJB 3.x will be automatically deactivated.
Other frameworks
Other frameworks, such as those listed below are always handled “out-of-the box”:
- EJB3, 3.1, 3.2
- JSF
- CDI
- Common-logging
- Dom4
- JUnit
- Log4J
- MX4J
- CICS ECI/CTG
Note:
- versions for EJB 3.x, JSF, CDI will follow the Java Version (i.e. the JDK) that is set for the source code.
- if you explicitly select an EJB2 profile (see above) then all configuration regarding EJB 3.x will be automatically deactivated.
When unsupported frameworks (i.e. not supported out-of the box) are part of the delivery, a Custom Environment Profile needs to be created to enable correct processing. To identify unknown frameworks or custom frameworks, there are various methods:
- Find all the XML files and look at the DTD they are referring to. This allows you to find frameworks like Spring, Hibernate… (You can use UltraEdit or a grep command to find the pattern DTD inside XML files in one go). Examples:
Framework |
DTD |
|---|---|
Hibernate |
|
iBATIS |
|
Spring |
|
- Look at the libraries: the names of the libraries can give you an indication. Examples:
Framework |
Libraries |
|---|---|
Hibernate |
hibernate3.jar |
iBATIS |
ibatis-common-2.jar |
Spring |
spring-1.2.7.jar |
- Look at the different extensions used throughout the entire
application. This information will also allow you to verify if the
default extension list used by the analyzer to parse client and
server source code is complete.Examples:
- .jhtml: for Java HTML (See http://en.wikipedia.org/wiki/JHTML ). This is used with Dynamo, a Java-based Web application server
- .jspx: JSPX pages are a special type of JSP page: They are pre-processed by the JSPXServlet, and converted into regular JSP pages (See: http://stackoverflow.com/questions/28235/should-i-be-doing-jspx-instead-of-jsp
- .jspf: for JSP Page Fragment
- .jrxml: for Jasper Report (http://en.wikipedia.org/wiki/JasperReports#JRXML )
If you have detected this framework through an XML file, you can start to customize the support of this XML (see Manage XML configuration files), but in any case, CAST recommend that you read up how it works and how it is configured.
Files to analyze
Click here to expand…
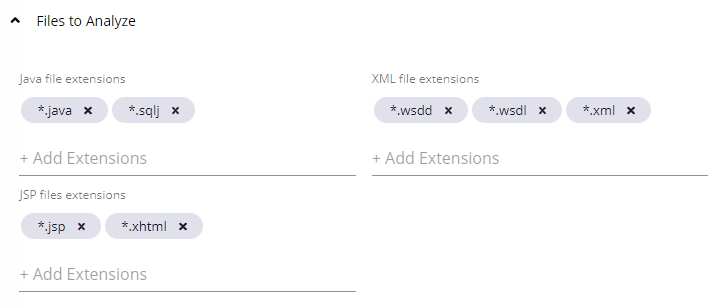
This section displays a list of the file extensions for the various parts of your JEE application. These file extensions are the default included in the current file filter and only files that match these file extensions will be taken into account during the analysis. You can manually update these file extensions if necessary.
Dependencies
Click here to expand…
Dependencies are configured at Application level for each technology and are configured between individual Analysis Units/groups of Analysis Units (dependencies between technologies are not available as is the case in the CAST Management Studio). You can find out more detailed information about how to ensure dependencies are set up correctly, in Advanced onboarding - review analysis configuration and execution for AIP Console.
Analysis Units
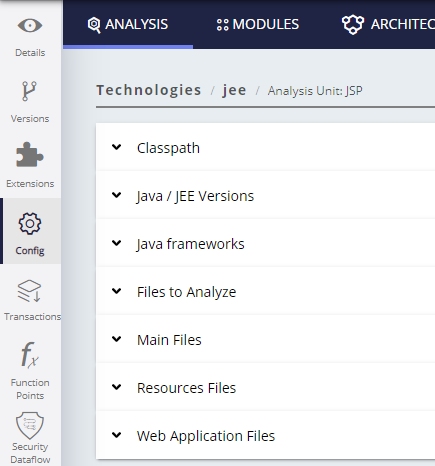
This section lists all Analysis Units created either automatically based on the source code discovery process or manually. You should check that at least one Analysis Unit exists for the specific technology. Settings at Analysis Unit level can be modified independently of the parent Technology settings and any other Analysis Units if required - click the Analysis Unit to view its technology settings:
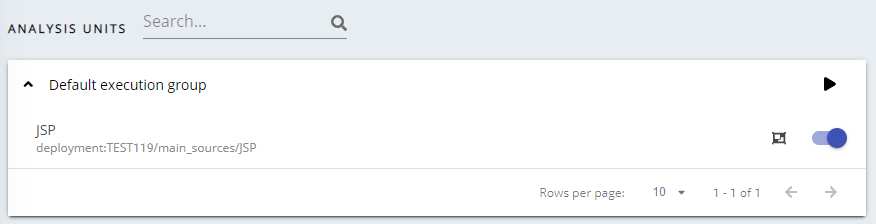
See Application - Config - Analysis - Working with Execution Groups for more information about the options available here. Clicking an Analysis Unit will take you directly to the available Analysis Unit level settings:
Technology settings at Analysis Unit level
Click here to expand…
Technology settings at Analysis Unit level are for the most part identical to those explained above. Some differences exist:
| Main Files | This section lists the location of the files for analysis. This is usually a location in the designated Deployment folder. You can include additional folder or exclude existing folders if required using the Add button. All three options will open the web interface on the following root folder location, unless the location has been changed during the AIP Console setup and installation: |
|---|---|
| Resource Files | These two options are read-only. They list any files that will be taken into account during the analysis, such as .XML, .properties and any files that correspond to the Enable JEE Web Profile Analysis option described at Technology level. |
| Web Application Files |