Analysis configuration
Using Console
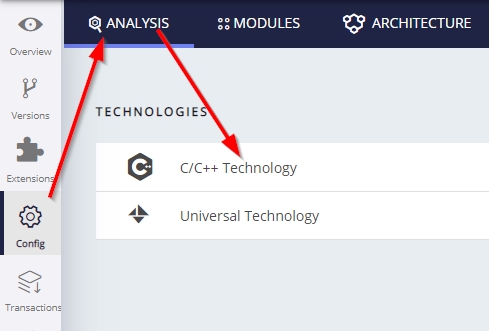
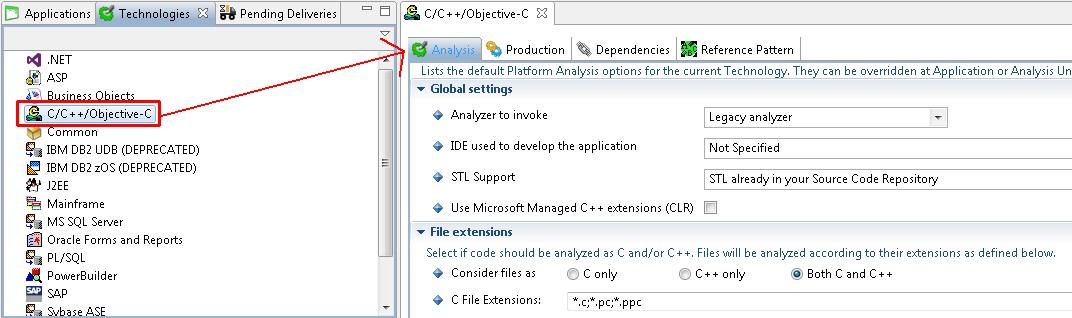
Console exposes the Technology configuration options once a version has been accepted/imported, or an analysis has been run. Click C/C++ Technology to display the available options:
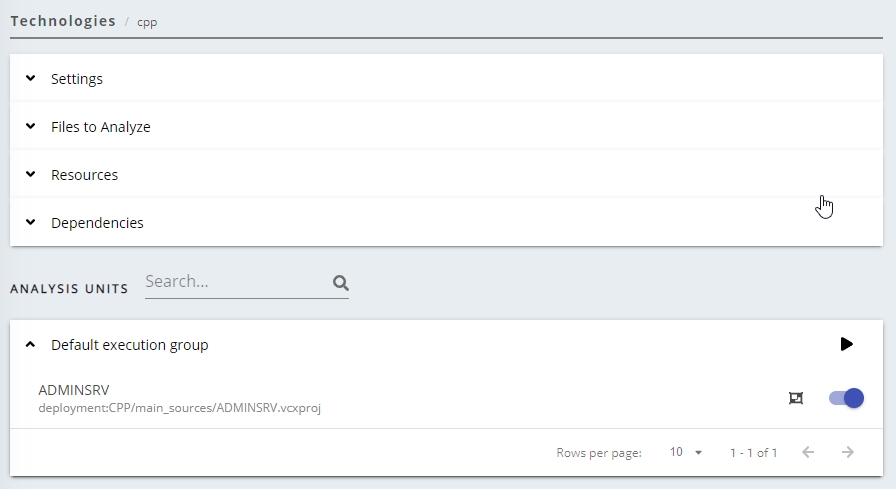
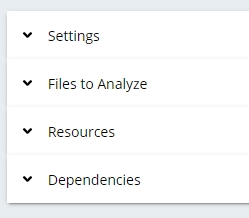
Technology settings are organized as follows:
- Settings specific to the technology for the entire Application (i.e. all Analysis Units)
- List of Analysis Units (a set of source code files to analyze)
created for the Application
- Settings specific to each Analysis Unit (typically the settings are the same or similar as at Application level) that allow you to make fine-grained configuration changes.
Settings are initially set according to the information discovered during the source code discovery process when creating a version. You should check that these auto-determined settings are as required and that at least one Analysis Unit exists for the specific technology:
Click to enlarge
Technology and Analysis Unit settings
Notes on Technology and Analysis Unit settings:
| Technology |
|
| Analysis Unit |
|
Technology level settings
Settings
| Option | Description | ||||||
|---|---|---|---|---|---|---|---|
| Development Environment | Use this option to choose the development environment of your source code files - this option is detected automatically during source code delivery. AIP Console then applies a default Environment Profile (these can be viewed here on the AIP Node: <install_folder>\EnvProf\CPP) that matches the selected Development Environment.
|
||||||
| STL Support | This option allows you to choose how you want CAST to handle STL header files that are referenced in your source code. Not all other Environment Profiles provided by CAST contain STL header files (for copyright reasons) and this can lead to an incomplete analysis, and thus to incomplete results. As a direct result of this, CAST has introduced this option that allows you to tell AIP Console whether the STL header files are available or not:
|
||||||
| Accept trigraphs | Select this option only if your code contains trigraphs. The analyzer will then interpret normalized character sequences as a single character - for example ??< will be interpreted as {. Note also that this option will also force the analyzer to accept digraphs. | ||||||
Files to Analyze
This section displays a list of the file extensions for the various parts of your C/C++ application. These file extensions are the default included in the current file filter and only files that match these file extensions will be taken into account during the analysis. You can manually update these file extensions if necessary.
| C File Extensions | Use this option to specify the file extensions that will be considered as C files for analysis purposes. By default, a list of extensions will already be present. | |
| C++ File Extensions | Use this option to specify the file extensions that will be considered as C++ files for analysis purposes. By default, a list of extensions will already be present. |
Resources
The options Force Include File and Includes enable you to define additional paths for files that have been specified in the #include part of your project files. This is to ensure the correct resolution of links to files located in other directories. The analyzer will take into account the two “include” styles:
- #include “fileA.h” > in this case, the analyzer will automatically search the path of the file that contains the #include, THEN the additional paths you have added and in the order specified.
- #include <fileB.h> > in this case, the analyzer will search the additional paths first then, THEN the path of the the file that contains the #include.
The include paths are locations from where the included headers are found. These parameters should be identified automatically from the compilation directives. The files found in these include paths will be saved in the Analysis schema. Thus, the only header paths you should mention here are the header path of the customer applications.
| Force Include File | This option is used to provide an extra header file which will be appended at the beginning of the preprocessed source, as if each source file were beginning with a #include directive on this file. It is useful in the following cases:
You should indicate here the "ExternFunctions.h". If you have several files to "force include", all you need to do is to create an additional file that will include them (using the #include directive) and set this file as being "force included".
|
||||||
|---|---|---|---|---|---|---|---|
| Includes | This option enables you to add your include paths:
Note that include paths configured in the current Includes
section will be processed BEFORE any definitions made in the
Environment Profiles associated to the Development
Environment option, and to any Custom Environment
Profiles you have added.
Defining include paths for Microsoft compilers Usually, if the Microsoft C++ compiler is installed on the analysis machine, you just need to select the default "Microsoft VCxxxx" Environment Profile (via the Development Environment option ). In some cases, you may also need to provide your include list yourself. The following rules should be followed:
In any of the three cases above, you will get an error message during the analysis such as: Include paths for Microsoft compilers should resemble the following: For Microsoft VC 9.0 (2008) and higher:
(the third one is for <windows.h> etc., the exact value for xx.xx depends on your exact installation) For older compilers:
For even older MS Dev 6 (VC98):
|
||||||
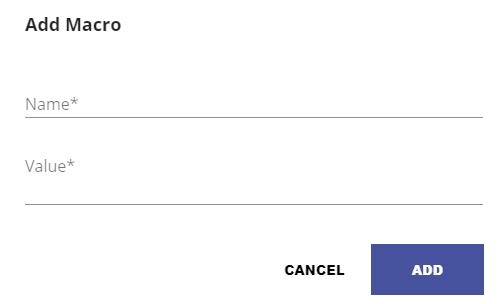
| Macros | Use this option to define any macros that are present in your source code and that need to be taken into account during the analysis.
|
Dependencies
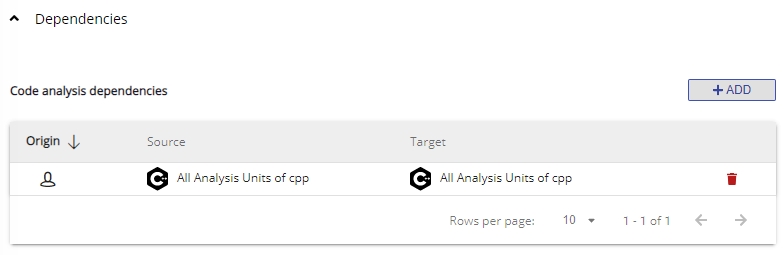
Dependencies are configured at Application level for each technology and are configured between individual Analysis Units/groups of Analysis Units (dependencies between technologies are not available as is the case in the CAST Management Studio). You can find out more detailed information about how to ensure dependencies are set up correctly, in Validate dependency configuration.
Analysis Units
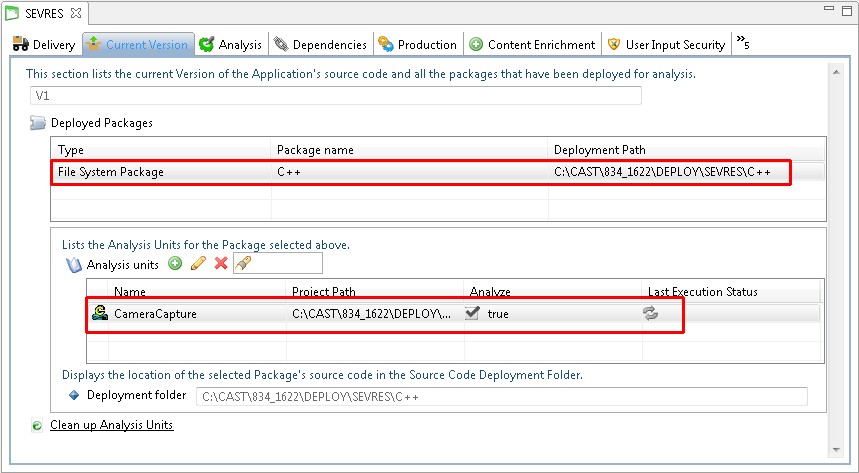
This section lists all Analysis Units created either automatically based on the source code discovery process or manually. You should check that at least one Analysis Unit exists for the specific technology. Settings at Analysis Unit level can be modified independently of the parent Technology settings and any other Analysis Units if required - click the Analysis Unit to view its technology settings:
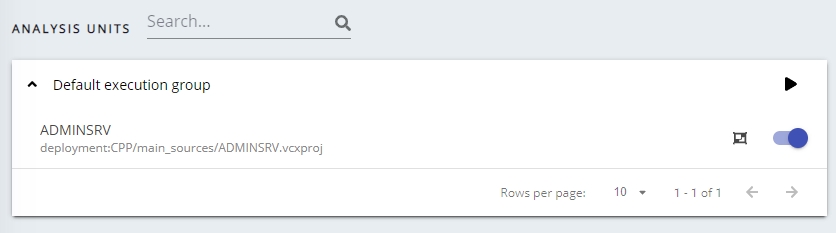
See Application - Config - Analysis - Working with Execution Groups for more information about the options available here. Clicking an Analysis Unit will take you directly to the available Analysis Unit level settings:

Technology settings at Analysis Unit level
Technology settings at Analysis Unit level are for the most part identical to those explained above. Some differences exist:
| Settings | Use Microsoft Managed C++ extensions (CLR) Select this option if your Source Code contains Microsoft Managed C++ extensions targeted at the Common Language Runtime (CLR). A corresponding Environment Profile will then be applied. See the following location on the AIP Node: Note that this option is automatically ticked if the project is configured to execute code under the Common Language Runtime virtual machine. |
|---|---|
| Main Files | This section lists the location of the files for analysis. This is usually a location in the designated Deployment folder. You can include additional folder or exclude existing folders if required using the Add button. All three options will open the web interface on the following root folder location, unless the location has been changed during the AIP Console setup and installation:
|

Using legacy CAST Management Studio
Introduction to analysis configuration options
The CAST Management Studio has three levels at which analysis configuration options can be set:
| Technology |
|
| Application |
|
| Analysis Unit |
|
Some settings at Application and Analysis Unit level have a “Reset” option - using this will reset the option to the value set at the parent level:

Auto-configuration validation
Technology / Application level
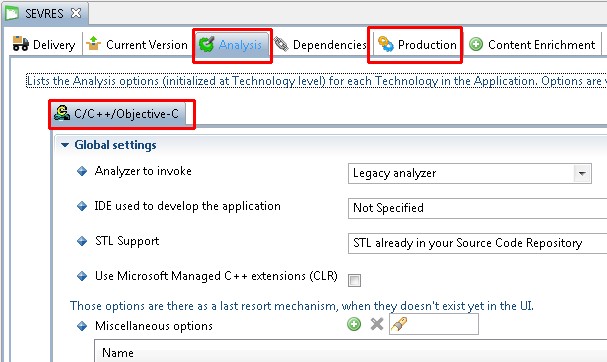
Using the Technology level or Application level options, validate the settings for C / C++ packages. Make any update as required. These settings apply to the Technology or Application as a whole (i.e. all Analysis Units):
Analysis Unit level
To inspect the auto-generated analysis configuration, you should review the settings in each Analysis Unit - they can be accessed through the Application editor:
Technology options
Normally, the source code discoverer will auto-configure the Analysis Unit and analysis settings as described above. However, in some circumstances, these settings may be incorrect and must be adjusted manually. The main parameters to work on are as follows:
- Source Settings
- Analysis
- IDE used for the Analysis Unit
- STL Support
- Include paths
- Macro definitions
- Precompiled header
- Environment Profile
The available options for configuring an analysis are described below. Note that some options are not available at specific levels (Technology/Application/Analysis Unit).
Source Settings
This tab shows the location of each type of source code in the C / C++ Analysis Unit - this is determined automatically by the CAST Delivery Manager Tool. You should, however, review the configuration and make any changes you need:
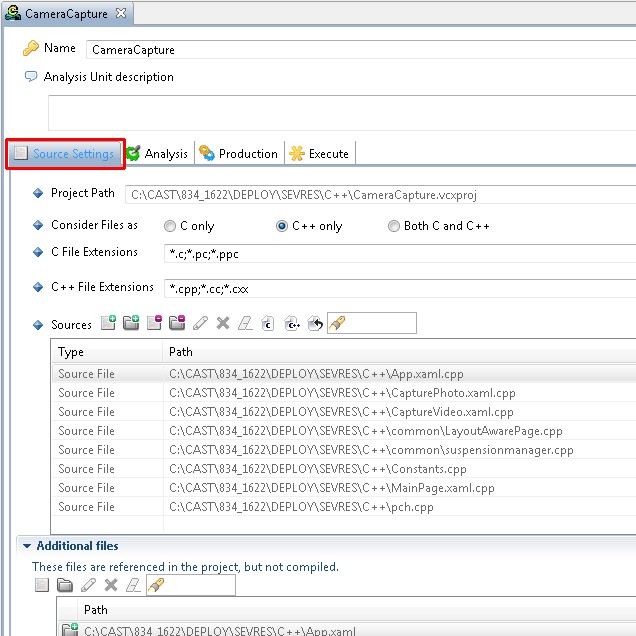
| Project path | The file based location of the corresponding project. This field is read-only. When the field contains User defined, this indicates that the Analysis Unit has been defined manually instead of automatically following the use of the CAST Delivery Manager Tool. | |
| Consider Files As | C only | If this option is selected, C++ specifics are
ignored (templates, namespaces, classes, inheritance and polymorphism)
and are not taken into account when the source files are analyzed.
This option allows optimized handling of C files. |
| C++ only | If this option is selected, C++ specifics (templates, namespaces, classes, inheritance and polymorphism) are taken into account when the source files are analyzed. | |
| Both C and C++ | If this option is selected only one distinct
job is generated and executed: one C++ technology job
using the Consider Files As > C++ option. However
the results stored in the CAST Analysis Service will contain both
C and C++ object types.
In other words, both file types are analyzed as C++ files and Line Of Code Count (LoC) for C files will be included in the C++ technology rather than the C technology. |
|
| C File Extensions | Use this option to specify the file extensions that will be considered as C files for analysis purposes. | |
| C++ File Extensions | Use this option to specify the file extensions that will be considered as C++ files for analysis purposes. | |
Impacts of choosing one parsing option over the other.
Selecting one of these options will cause the source code to be handled differently by the analyzer:
- A function or a method contains any number of declarations and at
least one definition. The grouping of these blocks in one unique
object is done differently by the analyzer according to whether the
C++ or C option has been selected:
- With option C, declaration or definition blocks with the same name are grouped together in the same function or in the same method without taking into account any parameters.
- With option C++, declaration or definition blocks with the same name and the same parameters are grouped together in the same function or in the same method.
For example, using the option C++ here would create two functions called “foo” in the Analysis Service schema, whereas using the C option would only create one “foo” function.
 void foo();
 void foo(int a)
 {
 }
- The analyzer detects calling links differently depending on whether
the C or C++ option is selected:
- With option C, the analyzer believes that the function or the method is called as soon as an object with the same name is called.
- With option C++, the analyzer believes that the function or the method is called if an object with the same name and comparable parameters is also called.
For example (and using the previous example), because using the C++ option with the previous example would create two functions “foo” in the Analysis Service - one with a parameter, the other without - the analyzer will only create a Call type link to the function WITHOUT the parameter. Using the C option, the analyzer will create a link to the one function even if it has parameters.
void main ()
 {
 foo();
 }
Notes
-
A file written in class C can be analyzed with the option C++ only with no risk. The only consequences are that the job may take slightly longer to run and some groupings of functions/methods with the same name but different parameters will not be carried out.
-
A file written in C++ must NOT be analyzed with the option C File.
-
When C/C++ Analysis Units are auto created in the CAST Delivery Manager Tool from Visual Studio project files (.vcproj files) and these project files have the Visual Studio option Compile As NOT set in bold (i.e. this reflects a default Visual Studio value which is not written in the .vcproj file), the CAST Management Studio will not be able to detect the Compile As value. As a result the Compile As value cannot be reflected in the Analysis Unit under the option Consider File As. In this instance, the source file extension will be used to determine the Analysis Unit Consider File As value.
For example, you may have a project which has the value Compile As set to Compile as C++ Code in the Visual Studio environment (NOT set in bold). In this instance, when the Analysis Units are auto created, the CAST Management Studio cannot detect the Compile As value and will set the Analysis Unit Consider File As option to C only (using the file extension).
-
If you have an application where .c files must be analyzed as C++ files, you should set the .c extension as a C++ extension - i.e. add it to the C++ File Extensions field.
Analysis
The settings in this tab govern how the source code is handled by the analyzer:
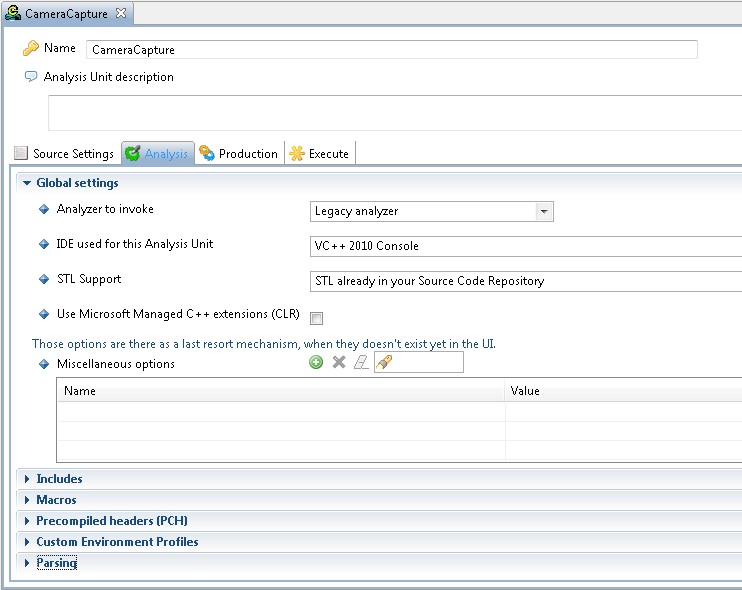
Global settings
| Analyzer to invoke | Use this option to choose between the analysis engine that will be used to run the analysis: |
Legacy analyzer
This option invokes the legacy C/C++ analyzer as provided in previous releases of CAST AIP and in the C and Cpp Analyzer extension. By default this option will always be active at Technology/Application/Analysis Unit level. Please do not modify this option when using the C and Cpp Analyzer extension. |
Clang analyzer
This option is only relevant for those that are using the CAST AIP Objective C Extension in order to analyze Objective C source code. This option must be active in order for the Objective C source code to be analyzed by correctly. If this option is invoked and:
|
||
| IDE used to develop the Application/Analysis Unit | Use this option to choose the
development environment of your source code files. The CAST
Management Studio then applies a default Environment
Profile (these can be viewed here:
<install_folder>\EnvProf\CPP) that matches the selected
Development Environment.
Note that if the CAST Delivery Manager Tool detects the source code as a variant of Visual C++, then the appropriate option will be set at Analysis Unit level. |
|
| STL Support | This option allows you to choose how you want CAST to handle STL header files that are referenced in your source code. Not all other Environment Profiles provided by CAST contain STL header files (for copyright reasons) and this can lead to an incomplete analysis, and thus to incomplete results. As a direct result of this, CAST has introduced this option that allows you to tell the CAST Management Studio whether the STL header files are available or not: | |
| CAST emulation |
If STL header files are not available in your source
code, select this option. This will then force the CAST Management
Studio to activate a basic (i.e. non exhaustive) emulation of the most
common STL headers (i.e. <string>, <vector>,
<algorithm> etc.), thus avoiding an incomplete analysis or
ambiguous/erroneous analysis results in most circumstances.
This option is provided via a pre-defined Environment Profile, and you can list the headers that are handled by viewing the contents of the following folder: |
|
| STL already in your Source Code Repository | If STL header files are
available in your source code, select this option. The STL
header files will be analyzed along with the rest of your source code as
normal.
This is the default option. |
|
| Use Microsoft Managed C++ extensions (CLR) | Select this option if your Source Code contains Microsoft Managed C++ extensions targeted at the Common Language Runtime (CLR). A corresponding Environment Profile will then be applied. See: Note that this option is automatically ticked if the project is configured to execute code under the Common Language Runtime virtual machine. |
|
Includes
The options Force Include File and Define the Include Paths enable you to define additional paths for files that have been specified in the #include part of your project files. This is to ensure the correct resolution of links to files located in other directories. The analyzer will take into account the two “include” styles:
- #include “fileA.h” > in this case, the analyzer will automatically search the path of the file that contains the #include, THEN the additional paths you have added and in the order specified.
- #include <fileB.h> > in this case, the analyzer will search the additional paths first then, THEN the path of the the file that contains the #include.
The include paths are locations from where the included headers are found. These parameters should be identified automatically from the compilation directives. The files found in these include paths will be saved in the Analysis Service. Thus, the only header paths you should mention here are the header path of the customer applications
The C++ Analyzer provides a feature that will scan the source code in order to detect missing header paths and macro definitions. This feature is available through the action Test analysis on the current Analysis Unit in the Execution tab of the Analysis Unit editor. The tools delivered in the CAST Implementation Framework are therefore no longer necessary.
You should not reference here any third party software header paths (see previous section). Also files that are common to several jobs should be defined in an Environment Profile. Note that include paths defined directly in the job are searched first. Include paths defined in Environment Profiles have a lesser priority. As for the compiler, inclusions defined within "" are searched within the path of the file being analyzed, while inclusions defined within <> aren’t.
You should also avoid adding more include paths than required: the search for an included file in the include path list occurs regularly and too many unnecessary paths will affect performance.
Note that the Include paths are not recursive unless you choose them to be: as such the default behavior is that sub-folders of the folders mentioned in the lists are not considered as potential include paths if not explicitly added to the list (nor are they in the compiler options of the output from the Macro Analyzer, so you should report them as is). However, if you have an include like #include “dir1/file1.h”, you should select the directory containing dir1, not the one containing file1.
| Force Include File | This option is used to provide an extra header file which will be appended at the beginning of the preprocessed source, as if each source file were beginning with a #include directive on this file. It is useful in the following cases:
You should indicate here the "ExternFunctions.h". If you have several files to "force include", all you need to do is to create an additional file that will include them (using the #include directive) and set this file as being "force included".
|
||||||||||
| Define the Include Paths used by the Analysis Unit | This option enables you to add your include paths:
Defining include paths for Microsoft compilers Usually, if the Microsoft C++ compiler is installed on the analysis machine, you just need to select the default "Microsoft VCxxxx" Environment Profile (via the IDE used to develop the Analysis Unit option above). In some cases, you may also need to provide your include list yourself. The following rules should be followed:
In any of the three cases above, you will get an error message during the analysis such as: Include paths for Microsoft compilers should resemble the following: For Microsoft VC 9.0 (2008) and higher:
(the third one is for <windows.h> etc., the exact value for xx.xx depends on your exact installation) For older compilers:
For even older MS Dev 6 (VC98):
|
||||||||||
Macros
Define the macros used by the application/analysis unit
Use this option to define any macros that are present in your source code and that need to be taken into account during the analysis.
| Adding a macro |
|
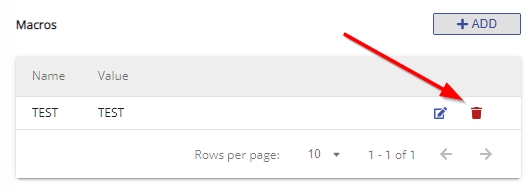
| Removing a macro | To remove a macro that you do not want to include in the analysis:
|
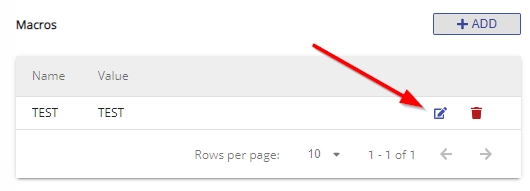
Editing a macro |
If you want to edit an existing macro:
|
Notes
|
|
Precompiled Headers (PCH)
| Precompiled header | Enter the name of a header file, that the majority of the source code files in the project include first, and that self includes many other library files. Typically “stdafx.h” on most Microsoft projects. |
| PCH generator | A source file that includes the Precompiled header file (as referenced above), and that should be analyzed first. Typically “stdafx.cpp” on most Microsoft projects. |
| Disable use of PCH | Selecting this option will cause Precompiled headers to be ignored. This is generally not recommended, as PCHs improve analysis speed. |
Custom Environment Profiles
This option enables you to select C/C++ based Environment Profiles that you have created yourself (as oppose to the Environment Profiles that are pre-defined by CAST and applied when the IDE used to develop the Application/Analysis Unit option is set)
Environment Profiles are a set of predefined configuration settings that can be included in an analysis. An Environment Profile can be particularly useful where you have several applications that rely on the same specific settings. By creating an Environment Profile that defines these settings, you then simply include the Environment Profile in the analysis. When the analysis is run, the settings in the Environment Profile are taken into account.
For C/C++ technologies, you can define:
- Include Paths
- Macros
See C and Cpp - Environment Profiles.
Parsing
| >> allowed to close nested template list | Many compilers allow to close two nested template lists with >> (instead of ">(blank)>" ). There is no reason to deactivate this option, unless "x>>y" is used in any template expression. |
| Accept Trigraphs | Select this option only if your code contains
trigraphs. The analyzer will then interpret normalized character
sequences as a single character - for example ??<
will be interpreted as {.
Note also that this option will also force the analyzer to accept digraphs. |
| Standard scope of "for" loops | Variables declared inside "for" loops are not
visible outside the loop.
Activating this option could generate messages about unknown variables on some pre-ISO compilers, like Microsoft VC6. |
| Standard processing of "typename" | According to the standard, "T::X", not preceded
by "typename" (where T is a template parameter) should always be
interpreted as an expression.
Activating this option is recommended on most compilers, except Microsoft compilers. |
| Detect unknown compilation directives | When this option is activated, the analyzer tries to detect compilation directives that have not been defined as macros (e.g. WINAPI and the like). Since this option is not 100% reliable, it is recommended to disable it once the analysis has been properly configured. |
Production
Click to enlarge
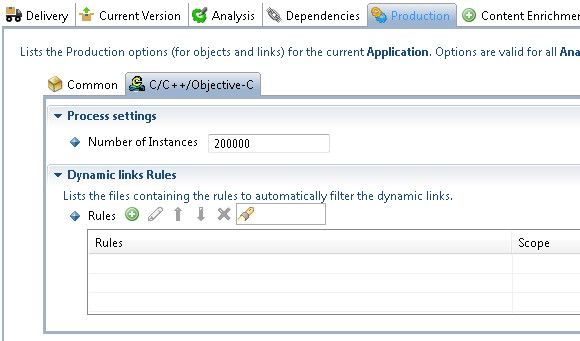
Process Settings
| Number of Instances | This option is only relevant when the
"Legacy analyzer" option is active. It allows you to
limit the number of objects held in memory before they
are committed to disk during the save process of an analysis.
Please contact CAST Support before modifying this option. |
Dynamic Links Rules
See the CAST Management Studio help for more information about this global option.