Created by N Padmavathi, last modified by James Hurrell on Dec 03, 2021
Introduction
How many Engineering Dashboards do I need?
CAST highly recommends that you install one Engineering Dashboard and consolidate all your Dashboard schemas into this.
Standalone or combined WAR file?
Click here to expand...
CAST provides the Engineering Dashboard in two WAR files as follows:
WAR file name | Description |
|---|
| com.castsoftware.aip.dashboard.engineering.<version>.war | Traditional "standalone" WAR file containing only the Engineering Dashboard. This document describes the installation using this WAR file. |
| com.castsoftware.aip.dashboard.<version>.war | "Combined" WAR file containing both the Engineering Dashboard and the Health Dashboard. |
You are free to use whichever WAR file you prefer to deploy the Engineering Dashboard (the requirements and prerequisites are identical), however if you are using both the Health Dashboard and Engineering Dashboard, to fulfil (for example) a "risk and quality" use case, then it would make sense to take advantage of the combined com.castsoftware.aip.dashboard.<version>.war file and deploy both dashboards from the same WAR file. If you do so, please note the following about using the "combined" WAR file:
- There is no need to specifically configure a URL for your Engineering Dashboard drilldown (via the "microscope" icon) from the Health Dashboard - when using the combined "WAR" file, access to the Engineering Dashboard from the Health Dashboard is pre-configured.
- Security access and authentication is common to both Dashboards. Therefore, if you setup Active Directory authentication, then this must be used to access both Dashboards - you cannot use "Default Authentication" for one Dashboard and "Active Directory" for the other.
- Role configuration is common to both Dashboards. Therefore "UserA" that has been granted the "admin" role, will have the "admin" role in both Dashboards.
- Data authorization is common to both Dashboards. Therefore if you authorize "UserA" to view Application "B" only via the authorizations.xml file, then this is true for both Dashboards. Note that authorizations based only on Tags and Categories created for the Health Dashboard (Tags and Categories are a feature that is not available in the Engineering Dashboard) WILL be applied in the Engineering Dashboard when using the combined war file.
- Group configuration is common to both Dashboards, regardless of the authentication mode in use. Therefore if you authorize "GroupD" to view Application "E" only, then this is true for both Dashboards.
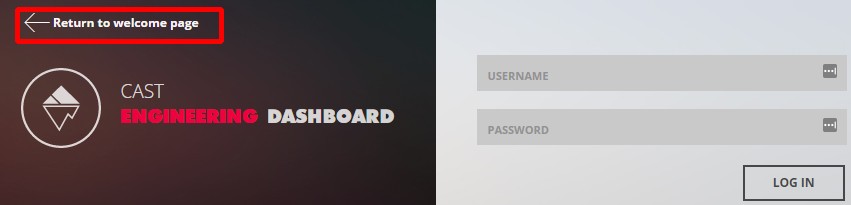
- On login, the user will be presented with a choice of Dashboard as shown below (Image 1) in a "Welcome" page. Clicking Access will take the user to the custom login screen for the chosen Dashboard where a "Return to welcome page" URL is available if the user wishes to login to the other Dashboard (Image 2):
Image 1 - Welcome page
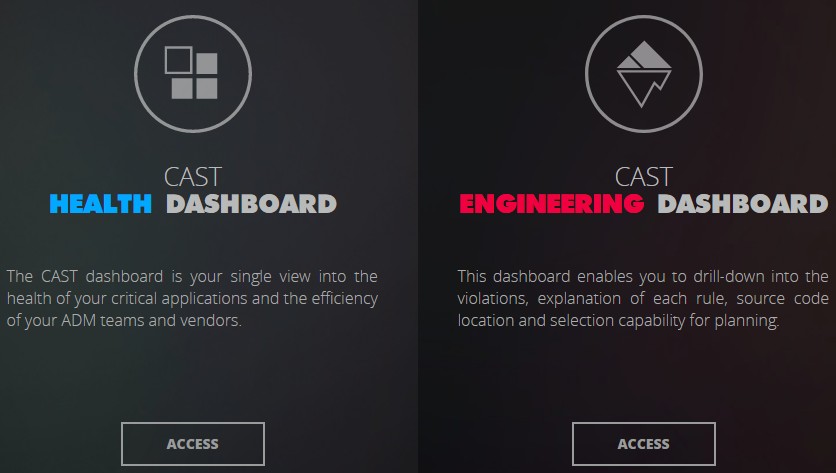
Image 2 - Return to welcome page URL
Requirements
See Standalone dashboard - installation requirements.
Pre-installation check list
Before beginning the installation process, please ensure that you have carried out all of the following tasks and that the following requirements have been met:
 | Ensure that your web application server is up and running. |
| Ensure you have read all Release Notes accompanying CAST products for any last-minute information. |
| Decide where the Engineering Dashboard will be installed. |
| Ensure that your user login on the target machine has sufficient user privileges to install applications. |
| Make sure you have the required .WAR file ready for deployment. |
Installation procedure
The installation process is divided into various steps:
| Step 1 | Rename and deploy the .WAR file on your application server |
|---|
| Step 2 | Configure your deployed .WAR file |
|---|
| Step 3 | Install the license key |
|---|
| Step 4 | Restart Tomcat and test connection |
|---|
| Step 5 | Configure user authentication |
|---|
| Step 6 | First login and become admin - ≥ 2.1 only |
|---|
| Step 7 | Configure roles |
|---|
| Step 8 | Generate snapshot data |
|---|
| Step 9 | Configure data authorization |
|---|
Step 1 - Rename and deploy the .WAR file on your application server
Rename WAR file
The name of the .WAR file will be included in the URL used to access the dashboard in a browser, as listed below. Therefore, before you deploy the .WAR file, you may wish to rename it to your own chosen name:
- ≥ 1.11.0 - the deployed folder will be named com.castsoftware.aip.dashboard.engineering.<version> (standalone .WAR) or com.castsoftware.aip.dashboard.<version> (combined .WAR)
- ≤ 1.10.0 - the deployed folder will be named CAST-Engineering (standalone .WAR) or CAST-Health-Engineering (combined .WAR)
Deploy the WAR file
Locate the .WAR file and move it to the web application installation location. By default on Apache Tomcat this is set to:
If the Apache Tomcat server is running, the .WAR file will then be unpacked and deployed in a folder matching the name of the .WAR file. If the Apache Tomcat server is not running, start it up and the WAR file will be automatically deployed.
For CAST Dashboards 1.x
Click here to expand...
context.xml file configuration
When the .WAR has been deployed you now need to configure the context.xml file to tell the web application where the Dashboard Service(s) are stored. This file is located here:
CATALINA_HOME\webapps\<deployed_war>\META-INF\context.xml
Instructions for Tomcat 8 / 8.5 / 9
Open the context.xml file (as detailed above) with an editor. By default, the file will contain an uncommented template as follows - this is tailored for connections to Dashboard schemas located on a CAST Storage Service / Postgres instance running with port 2280 using Tomcat 8 / 8.5 / 9:
<Resource name="jdbc/domains/AED" url="jdbc:postgresql://localhost:2280/postgres"
	connectionInitSqls="SET search_path TO [Central Schema];"
	username="operator" password="CastAIP"

	auth="Container" type="javax.sql.DataSource" driverClassName="org.postgresql.Driver"
	validationQuery="select 1"
	initialSize="5" maxTotal="20" maxIdle="10" maxWaitMillis="-1"/>
- Set the
URL parameter to the server on which the Dashboard schema is located:- change the "
localhost" to the name of the server on which the host CSS is located - change the port from
2280 if necessary
- Change [Central Schema] to the name of the Dashboard schema you are using.
- Ensure the
username and password parameters are correct (note that if you need to encrypt the username and password to avoid entering names in clear text, please see: Encrypt login and password for database and LDAP) - You should end up with a section something like this:
<Resource name="jdbc/domains/AED" url="jdbc:postgresql://my_schema:2282/postgres"
	connectionInitSqls="SET search_path TO my_central_schema;"
	username="operator" password="CastAIP"

	auth="Container" type="javax.sql.DataSource" driverClassName="org.postgresql.Driver"
	validationQuery="select 1"
	initialSize="5" maxTotal="20" maxIdle="10" maxWaitMillis="-1"/>
Following any changes you make, save the context.xml file and then restart your application server so that the changes are taken into account.
Instructions for Tomcat 7
Open the context.xml file (as detailed above) with an editor. By default, the file will contain an uncommented template as follows - this is tailored for connections to Dashboard schemas located on a CAST Storage Service / Postgres instance running with port 2280 using Tomcat 8 / 8.5 / 9:
<Resource name="jdbc/domains/AED" url="jdbc:postgresql://localhost:2280/postgres"
	connectionInitSqls="SET search_path TO [Central Schema];"
	username="operator" password="CastAIP"
	auth="Container" type="javax.sql.DataSource" driverClassName="org.postgresql.Driver"
	validationQuery="select 1"
	initialSize="5" maxTotal="20" maxIdle="10" maxWaitMillis="-1"/>
You need to comment this template by adding <!-- and --> around the section:
<!--
<Resource name="jdbc/domains/AED" url="jdbc:postgresql://localhost:2280/postgres"
	connectionInitSqls="SET search_path TO [Central Schema];"
	username="operator" password="CastAIP"
	auth="Container" type="javax.sql.DataSource" driverClassName="org.postgresql.Driver"
	validationQuery="select 1"
	initialSize="5" maxTotal="20" maxIdle="10" maxWaitMillis="-1"/>
-->
Now locate the Tomcat 7 template - this is located here:
<!--  Tomcat 7 Documentation : http://ci.apache.org/projects/tomcat/tomcat7/docs/jndi-resources-howto.html -->
<!-- These connections examples on Tomcat 7 are provided for CSS connections especially useful for REST API on central database.
add parameter if you don't want to use the connection pool :
- for CSS : initConnectionSqls="SET search_path TO ${schema};"

template for resources on CSS with connection pool mode :
    <Resource name="jdbc/domains/${domainName}"
            url="jdbc:postgresql://${host}:${port}/postgres"
            username="${user}" password="${password}"
            auth="Container" type="javax.sql.DataSource" driverClassName="org.postgresql.Driver"
            validationQuery="select 1" initialSize="5" maxActive="20" maxIdle="10" maxWait="-1"/>

template for resources on CSS without connection pool mode :
    <Resource name="jdbc/domains/${domainName}"
            url="jdbc:postgresql://${host}:${port}/postgres"
            username="${user}" password="${password}"
            initConnectionSqls="SET search_path TO ${schema};"
            auth="Container" type="javax.sql.DataSource" driverClassName="org.postgresql.Driver"
            validationQuery="select 1" initialSize="5" maxActive="20" maxIdle="10" maxWait="-1"/>
-->
Copy the Tomcat 7 for CSS without connection pool mode template into uncommented white space:
<Resource name="jdbc/domains/${domainName}"
	url="jdbc:postgresql://${host}:${port}/postgres"
	username="${user}" password="${password}"
	initConnectionSqls="SET search_path TO ${schema};"
	auth="Container" type="javax.sql.DataSource" driverClassName="org.postgresql.Driver"
	validationQuery="select 1" initialSize="5" maxActive="20" maxIdle="10" maxWait="-1"/>
- Set the
${domainName} value to AED - Set the
URL parameter to the server on which the Dashboard schema is located:- change the
${host} to the name of the server on which the host CAST Storage Service/PostgreSQL instance is located - change the
${port} values to the required port (e.g.: 2280, 2282, 2284 or a custom port depending on the CAST Storage Service/PostgreSQL instance you are running).
- Ensure the
${user} and ${password} parameters are correct - use the operator and CastAIP username/password combination if you have not changed these defaults (note that if you need to encrypt the username and password to avoid entering names in clear text, please see: Encrypt login and password for database and LDAP) - Change
${schema} to the name of the Dashboard schema - You should end up with a section something like this:
- Following any changes you make, save the context.xml file.
Configuring access to multiple Dashboard schemas
If you would like to configure access to multiple Dashboard schemas for use with your Engineering Dashboard, please do as follows:
- For each additional Dashboard Service you want to configure access to, please add an uncommented configuration template (these are supplied in the context.xml file - ensure you chose the correct template for Tomcat 7 or Tomcat 8/8.5/9) for the target CAST Storage Service/PostgreSQL instance underneath the section configured for your initial Dashboard schema
- First change the
name parameter to something other than "jdbc/domains/AED" (the default "name" used in the pre-provided templates) - CAST recommends using the name of your target Dashboard Service - for example "jdbc/domains/my_central_schema" (you must retain the "jdbc/domains" part of the the name). This is because each Dashboard schema you connect to the Engineering Dashboard must have a unique "name" parameter - Set the
URL parameter to the server on which the additional Dashboard schema is located:- change the
${host} to the name of the server on which the host CAST Storage Service/PostgreSQL instance is located - change the
${port} values to the required port (e.g.: 2280, 2282, 2284 or a custom port depending on the CAST Storage Service/PostgreSQL instance you are running).
- Ensure the
${user} and ${password} parameters are correct - use the operator and CastAIP username/password combination if you have not changed these defaults (note that if you need to encrypt the username and password to avoid entering names in clear text, please see: Encrypt login and password for database and LDAP) - Change
${schema} to the name of the Dashboard schema - Following any changes you make, save the context.xml file.
Connection pooling
It is possible to modify the connection configuration for the Engineering Dashboard to pool multiple Dashboard schemas in one resource "domain". In other words, you no longer have to configure one resource (in the context.xml) per Dashboard schema, instead, one resource (in the context.xml) can function for multiple Dashboard schemas. Please see CAST Dashboard Service schema connection configuration pooling for more information.
For CAST Dashboards 2.x
Click here to expand...
Modify application.properties to define connection to CSS/PostgreSQL for AIP schemas
When the .WAR has been deployed you now need to configure the application.properties file to tell the web application on which CAST Storage Service/PostgreSQL instance the Dashboard schemas are stored. This file is located here:
CATALINA_HOME\webapps\<deployed_war>\WEB-INF\classes\application.properties
Locate the following section in the file:
## DATASOURCE
# Resource1 is the datasource name used in domains.properties
# Adapt server name (localhost) and port (2282) if required
# You can add multiple datasources if you want to connect to multiple CSS Servers. Datasource name must be unique
# You have to configure your domains names and relative schema names in domains.properties
restapi.datasource[0].url=jdbc:postgresql://localhost:2282/postgres
restapi.datasource[0].username=operator
restapi.datasource[0].password=CastAIP
restapi.datasource[0].poolname=Resource1
restapi.datasource[0].minimumIdle=10
restapi.datasource[0].maximumPoolSize=20
If all your Dashboard schemas are located on one single CAST Storage Service/PostgreSQL instance then you need to modify the url, username and password entries to match your target CAST Storage Service/PostgreSQL, for example:
## DATASOURCE
# Resource1 is the datasource name used in domains.properties
# Adapt server name (localhost) and port (2282) if required
# You can add multiple datasources if you want to connect to multiple CSS Servers. Datasource name must be unique
# You have to configure your domains names and relative schema names in domains.properties
restapi.datasource[0].url=jdbc:postgresql://192.168.200.104:2282/postgres
restapi.datasource[0].username=operator
restapi.datasource[0].password=CastAIP
restapi.datasource[0].poolname=Resource1
restapi.datasource[0].minimumIdle=10
restapi.datasource[0].maximumPoolSize=20
If your Dashboard schemas are located on multiple CAST Storage Services/PostgreSQL instances, you need to add in the additional servers as shown in the example below:
- Ensure that you modify the
url, username, password and resource entries to match your target CAST Storage Service/PostgreSQL. In particular, the resource entry must be unique within the application.properties file. - The
[0] must also be incremented for additional CAST Storage Service/PostgreSQL instances, for example, use restapi.datasource[1], restapi.datasource[2] etc.
## DATASOURCE
# Resource1 is the datasource name used in domains.properties
# Adapt server name (localhost) and port (2282) if required
# You can add multiple datasources if you want to connect to multiple CSS Servers. Datasource name must be unique
# You have to configure your domains names and relative schema names in domains.properties
restapi.datasource[0].url=jdbc:postgresql://192.168.200.104:2282/postgres
restapi.datasource[0].username=operator
restapi.datasource[0].password=CastAIP
restapi.datasource[0].poolname=Resource1
restapi.datasource[0].minimumIdle=10
restapi.datasource[0].maximumPoolSize=20

restapi.datasource[1].url=jdbc:postgresql://192.168.200.105:2282/postgres
restapi.datasource[1].username=operator
restapi.datasource[1].password=CastAIP
restapi.datasource[1].poolname=Resource2
restapi.datasource[0].minimumIdle=10
restapi.datasource[0].maximumPoolSize=20
Save the file before proceeding.
Modify domains.properties
You now need to configure the domains.properties file which provides a link between the CAST Storage Services/PostgreSQL instances defined in the application.properties file and the Dashboard schemas containing the relevant snapshot data. This file is located here:
CATALINA_HOME\webapps\<deployed_war>\WEB-INF\classes\domains.properties
This file is delivered empty as shown below:
# Domains for ED
# empty lines in this file lead to connection error, remove all empty lines
# - You have to align [Resource1] with the resource name configured in application.properties
# - You have to replace [Central Schema1] by the central schema name
# - Domains names must be unique
# AED1=Resource1,[Central Schema1]
# AED2=Resource1,[Central Schema2]
For each Dashboard schema that you need to display in the CAST Engineering Dashboard, add one line to the file ensuring that there are no empty lines:
| AED1 | This is known as the "domain" and this must be unique in the domains.properties file. Therefore for each Dashboard schema you need to display in the CAST Engineering Dashboard, you need to assign one unique domain. You can use any domain name notation you want, however, CAST highly recommends incrementing the number, i.e. AED1, AED2, AED3 etc. |
|---|
| Resource1 | This entry refers to the CAST Storage Service/PostgreSQL instance as defined in the application.properties file. |
|---|
| [Central Schema1] | This entry refers to the Dashboard schema containing the relevant Application data. |
|---|
For example, for one single Dashboard schema called "MEUDON_CENTRAL" stored in the CAST Storage Service/PostgreSQL instance defined in Resource1 in the application.properties file, add the following:
# Domains for ED
# empty lines in this file lead to connection error, remove all empty lines
# - You have to align [Resource1] with the resource name configured in application.properties
# - You have to replace [Central Schema1] by the central schema name
# - Domains names must be unique
# AED1=Resource1,[Central Schema1]
# AED2=Resource1,[Central Schema2]
AED1=Resource1,MEUDON_CENTRAL
For multiple Dashboard schemas where all schemas are located in the same CAST Storage Service/PostgreSQL instance defined in Resource1 in the application.properties, add the following:
# Domains for ED
# empty lines in this file lead to connection error, remove all empty lines
# - You have to align [Resource1] with the resource name configured in application.properties
# - You have to replace [Central Schema1] by the central schema name
# - Domains names must be unique
# AED1=Resource1,[Central Schema1]
# AED2=Resource1,[Central Schema2]
AED1=Resource1,MEUDON_CENTRAL
AED2=Resource1,SEVRES_CENTRAL
AED3=Resource1,PARIS_CENTRAL
For multiple Dashboard schemas where the schemas are located on different CAST Storage Services/PostgreSQL instances (Resource1 and Resource2) as defined in the application.properties file, add the following:
# Domains for ED
# empty lines in this file lead to connection error, remove all empty lines
# - You have to align [Resource1] with the resource name configured in application.properties
# - You have to replace [Central Schema1] by the central schema name
# - Domains names must be unique
# AED1=Resource1,[Central Schema1]
# AED2=Resource1,[Central Schema2]
AED1=Resource1,MEUDON_CENTRAL
AED2=Resource2,SEVRES_CENTRAL
AED3=Resource2,PARIS_CENTRAL
Save the file before proceeding.
Modify application.properties to define connection to CSS/PostgreSQL for the roles/permissions schema - ≥ 2.1 only
In ≥ 2.1 only, an interface exists to manage User roles - 2.x and above and Data authorization - 2.x and above - this interface stores all its records in a dedicated schema on a CAST Storage Service/PostgreSQL instance. This instance does not need to be the same as used for your AIP schemas (Dashboard/Measure schemas), however, the required schema is small and therefore CAST recommends using an existing CAST Storage Service/PostgreSQL instance to host it. The schema is created automatically when you start up your Dashboard deployment if it does not already exist.
The application.properties file contains a section dedicated to this schema - this file is located here:
CATALINA_HOME\webapps\<deployed_war>\WEB-INF\classes\application.properties
Locate the following section in the file:
#datasource configuration for user management
spring.datasource.url=jdbc:postgresql://localhost:2282/postgres?ApplicationName=DASHBOARDS¤tSchema=cast_dashboards
spring.datasource.platform=postgres
spring.datasource.username=operator
spring.datasource.password=CastAIP
spring.datasource.initialization-mode=always
spring.datasource.driver-class-name=org.postgresql.Driver
spring.liquibase.change-log=classpath:db/changelog/db.changelog-master.xml
spring.liquibase.default-schema=cast_dashboards
spring.liquibase.enabled=true
Change the line spring.datasource.url to match the CAST Storage Service/PostgreSQL instance you intend to use for the roles/permissions schema, for example:
#datasource configuration for user management
spring.datasource.url=jdbc:postgresql://192.168.200.104:2282/postgres?ApplicationName=DASHBOARDS¤tSchema=cast_dashboards
spring.datasource.platform=postgres
spring.datasource.username=operator
spring.datasource.password=CastAIP
spring.datasource.initialization-mode=always
spring.datasource.driver-class-name=org.postgresql.Driver
spring.liquibase.change-log=classpath:db/changelog/db.changelog-master.xml
spring.liquibase.default-schema=cast_dashboards
spring.liquibase.enabled=true
Save the file before proceeding. This will ensure that a schema called "cast_dashboards" is created on the target CAST Storage Service/PostgreSQL instance when you start the web application.
Step 3 - Install the license key
As explained in Dashboard Service license key configuration, when you want to access a Dashboard schema using the CAST RestAPI (i.e. via the Engineering Dashboard, or via the CAST Report Generator), a special license key is required. This license key grants specific access to one or multiple Dashboard schemas for the web application in which it is installed (i.e. the Engineering Dashboard or the CAST RestAPI).
You must therefore install the license key and, if you are using a restricted license key, define data access authorization. These two steps are explained in Dashboard Service license key configuration in the sections How do I install a license key? and How to authorize users when using a RESTRICTED license key.
Step 4 - Restart Tomcat and test connection
Restart Tomcat
Before proceeding, ensure you restart your application server so that the configuration changes you made are taken into account.
Test access to the Engineering Dashboard
You can now access the Engineering Dashboard using the URL:
http://<server_name>:[<port_number>]/<name-of_deployed_war>
You should see the login page as follows - this indicates that the initial setup was successful:
This step involves configuring how your users will authenticate with the CAST Engineering Dashboard. Most organizations opt for LDAP/Active Directory integration so that users can use their corporate username/password to access the resources they need. The Engineering Dashboard also has a built in username/password authentication mechanism which is enabled "out of the box". See User authentication.
Step 6 - First login and become admin - ≥ 2.1 only
By default, the CAST Dashboard requires that at least one user is granted the ADMIN role following the first login after the User authentication configuration. This ensures that one user can access all data and cofiguration settings. See First login and become admin. This step is not required when using Dashboards 1.x and can be skipped.
This step involves configuring roles for users and groups that are accessing the CAST Engineering Dashboard. See User roles.
Step 8 - Generate snapshot data
Before your users can "consume" data via the CAST Engineering Dashboard, you need to generate snapshot data.
An Authorization defines permission to access and "consume the data" in a specific Application or group of Applications via the CAST Engineering Dashboard. If permission is not granted, or a "restriction" is used, then any information related to this Application will be not accessible: application properties such as name, technologies or grades and measures, etc. Therefore, an Authorization must be defined before a user/group of users can access a specific application. See Data authorization.
Advanced configuration specific to the CAST Engineering Dashboard:
Additional advanced configuration options:
