Created by James Hurrell on Nov 02, 2023
Accessing the Applications panel
Login with a user account that already has the Admin role and switch to the Admin Center:

Now move to the Applications panel:

Available options
The Applications option provide a means to add new Applications and Domains and administer existing Applications and Domains:
Click to enlarge
| ≥ 2.x | Click to enlarge 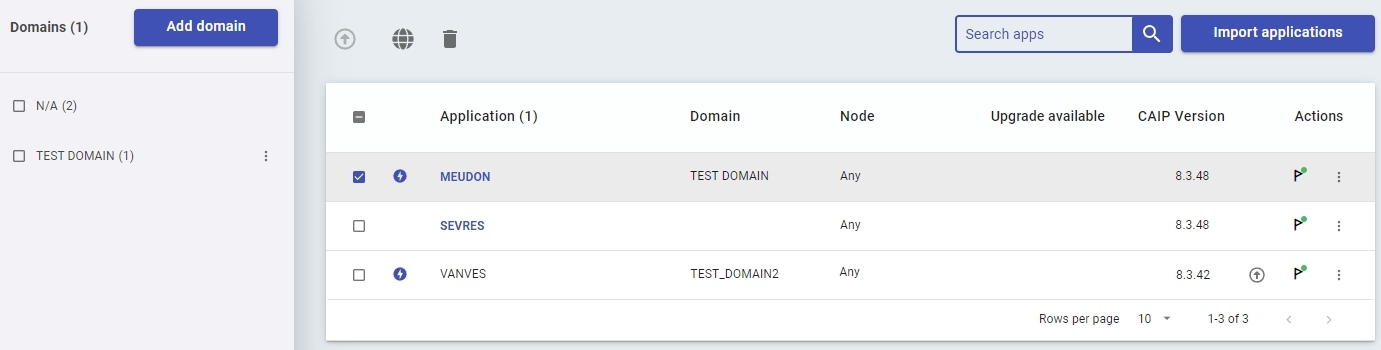
|
|---|
| 1.x | Click to enlarge 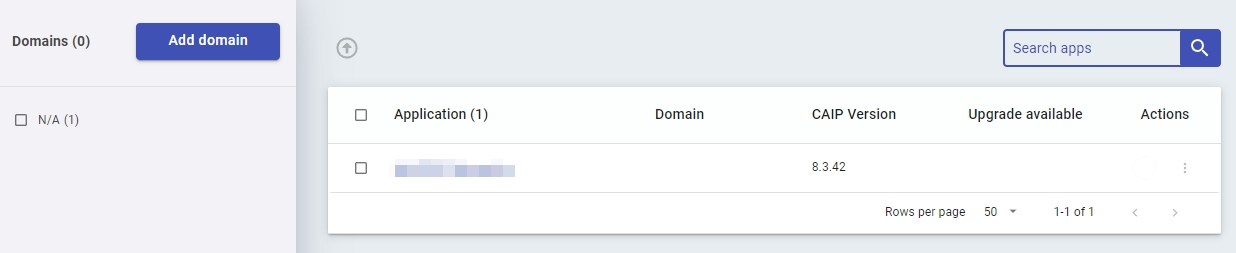
|
|---|
Domains
The left hand panel displays existing domains and provides a means to configure them. A "domain" is a method of grouping Applications together so that user roles can be assigned. Out of the box, no domains are provided and all new Applications will not belong to any domain (they will appear in the N/A group):
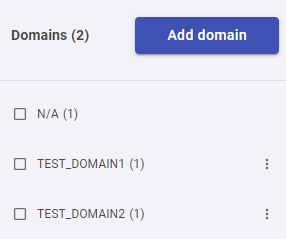
| Add domain | Click this button to add a new Domain to Console. You can create any number of domains: 
|
|---|
| Tick box | The tick box along side the name of the domains allows you to filter the list of Applications in the right hand panel. Ticking a domain will only display Applications belonging to the selected domain: 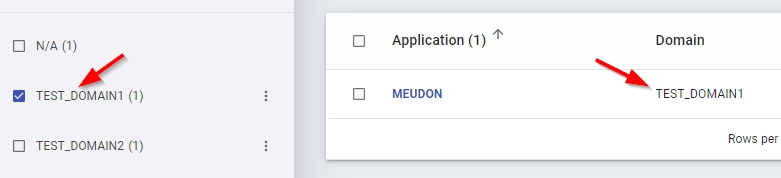
|
|---|
Options
 | Edit: edit an existing domain - i.e. change its name: 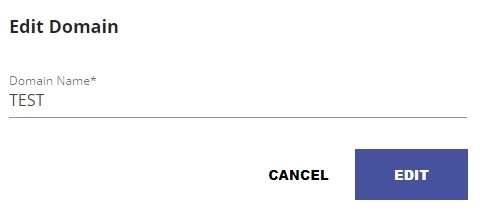
|
|---|
Delete: delete an existing domain. You can only delete a domain if no Applications are assigned to it. |
| Manage User Roles: This option enables you to add resource level roles to the current domain and any applications belonging to that domain. See Administration Center - Security - User Roles. |
Applications
Any Application that has been added in Console will be visible in this list. The list displays applications based on the domain that they are assigned to. In the following example, there are three Applications:
- one belongs to TEST_DOMAIN1 (MEUDON)
- one belongs to TEST_DOMAIN2 (SEVRES)
- one does not belong to any domain ISSY)
Click to enlarge
| This option allows you to perform an Application/schema upgrade on one or multiple applications. By default the icon is disabled until you select an Application that is eligible for upgrade, and will then enable: - ≥ 2.x: applications will be eligible for upgrade when their AIP Core release is older than the AIP Core release available on ANY Node managed in Console
- 1.x: applications will be eligible for upgrade when the AIP Core release used for the Application is older than the AIP Core release installed on the current Node

When you click the icon, a warning is displayed (see image below) before the upgrade action is started. In ≥ 2.x, you can also choose the target AIP Core release - this drop down box will list all the AIP Core releases available on Nodes managed by Console that are NEWER than the AIP Core release used for the current Application: 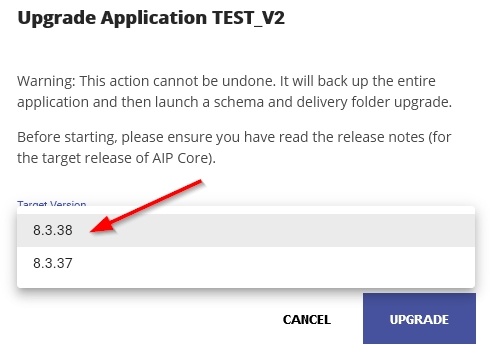
|
|---|
 (≥ 2.5 only) (≥ 2.5 only)
| This option enables you to change the domain for multiple applications. It is active only when at least one application is selected:
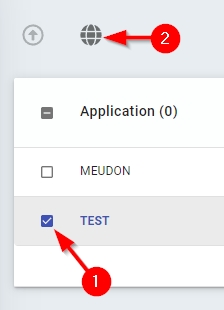 When clicked, a popup dialog box will be displayed enabling you to select the domain that you wish to change the selected applications to - select the domain from the drop down list (the domain must exist already). All selected applications will be changed to the chosen domain when the Save button is clicked. 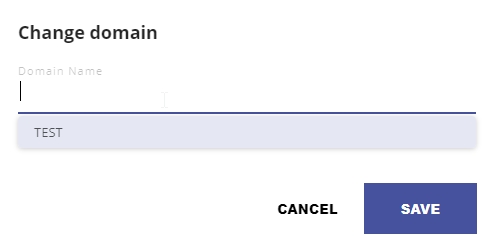
|
|---|
 (≥ 2.7 only) (≥ 2.7 only)
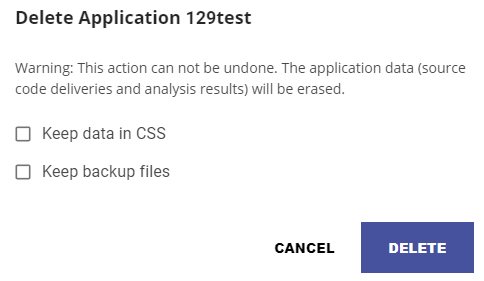
| This option enables you to bulk delete multiple applications. It is active only when at least one application is selected: 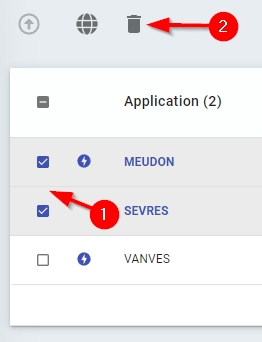
When an Application is deleted, the Application's delivery / deploy folders and all Application schemas stored on the PostgreSQL instance will be deleted. - If you want to retain the Application schemas, ensure you tick the Keep data in CSS option.
- If you want to retain any backup data on disk (see the Backup section in Administration Center - Applications - Application Details for more information about where the backups are stored) related to the application, ensure you tick the Keep backup data option.
 |
|---|
| Search apps | Use this field to search for a specific Application. The search is performed on the Application name. |
|---|

(≥ 2.x only) | If you would like to import into Console ≥ 2.x any existing applications that are currently managed entirely with CAST Management Studio, then you can use the Import Applications button. Prerequisites - The Delivery folder for the Applications you want to import must ALREADY be stored in the shared Delivery folder defined for Console ≥ 2.x. In other words, the delivery folder path for the Application in CAST Management Studio must match the Delivery folder path defined for Console ≥ 2.x. You can check the location of the Delivery folder for Console ≥ 2.x by accessing the following URL and looking for the path defined by the entry
application.paths.delivery-folder:
http://<console_host>:8088/config/aip-node-app/default
- Console ≥ 2.x must have Node instance defined within it that is running the same release of AIP Core as used by the applications you want to import.
- The Application schemas for the applications you want to import must be stored on a PostgreSQL instance that has already been declared in Console ≥ 2.x - see Administration Center - Settings - CSS and Measurement settings.
Process Click Import Applications and choose the host PostgreSQL instance on which the schemas for your Application are stored - Console will then scan the selected host and display a list of Applications that are not already managed in Console ≥ 2.x: 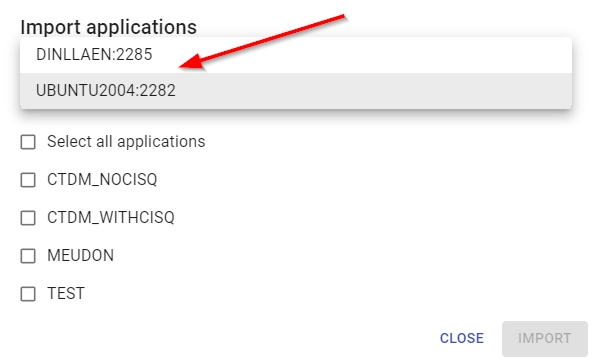
Select the Application(s) you want to import, then click the Import button: 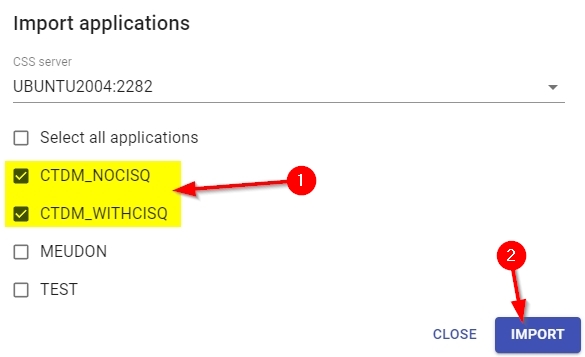
During the import, Console will check that the selected Application's delivery folder can be located in the shared Delivery folder location. If this Delivery folder is located, a successful import will be indicated by the following message (the Application will also appear in the list of available applications in the Administration Center and in the AIP Console - Application Management screen: 
The following message indicates that Console cannot find the Application's Delivery folder (in the shared Delivery folder location) and the import has failed: 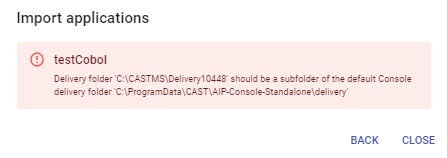
This error can only be fixed by running a SQL query (against
in the CMS_PREFS_SOURCES
table in the application's _MNGT
schema) to update the application's Delivery folder, as
shown below, however, you should ALSO contact CAST Support
for advice before running this query:
update cms_pref_sources
set serverpath = "<path>\{app-guid}"
|
|---|
| Columns | | Tick box | Used in conjunction with the  and icons. |
|---|
| Onboarding with Fast Scan icon | The following icon indicates that the corresponding application has been onboarded using the onboarding with Fast Scan workflow (see Workflow - Application onboarding with Fast Scan): 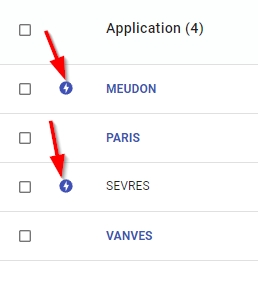
|
|---|
| Application | Name of the application. |
|---|
| Domain | Lists the domain that the Application belongs to, if any. |
|---|
| Node (≥ 2.4 only) | Indicates which Node the application is specifically assigned to. If Any is displayed, Console will use its load balancer and any Node can be used to perform an action (analysis etc.). See also Administration Center - Nodes. |
|---|
| CAIP version | This icon indicates the release of AIP Core currently used for each application: 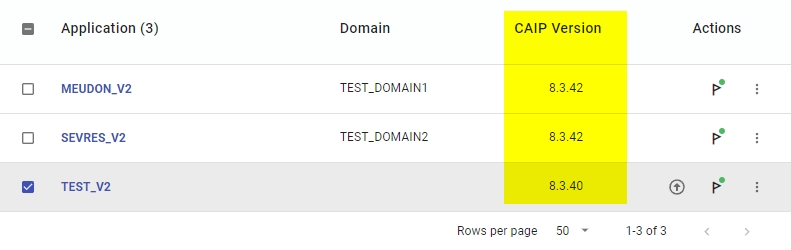
If any Node currently managed in Console is using a NEWER release of AIP Core then the upgrade eligibility icon will also be displayed. This indicates that the Application can be upgraded (schema/application upgrade) to the newer release of AIP Core. Clicking the icon will start the upgrade process. 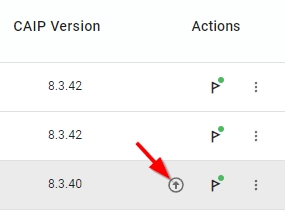
|
|---|
| Upgrade available (1.x only) | 
This icon indicates that the application is eligible for a schema upgrade - in other words, the AIP Core release used for the Application is older than the AIP Core release installed on the Node. You can find out more about this in Application and schema upgrade using AIP Console. |
|---|
| View last action outcome | 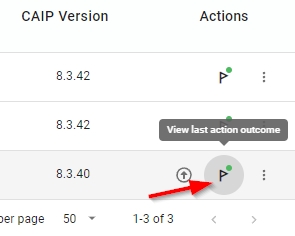
Displays the list of actions most recently actioned for the domain in a slide out window: 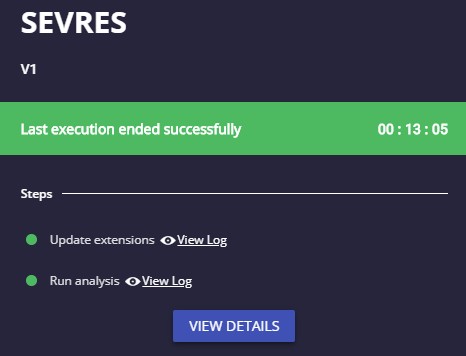
|
|---|
|
|---|
| 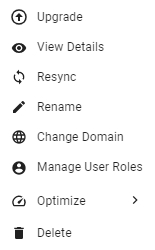
| Upgrade (1.x only) | This option is only visible when an application is eligible for a schema upgrade - in other words, the AIP Core release used for the Application is older than the AIP Core release installed on the Node: 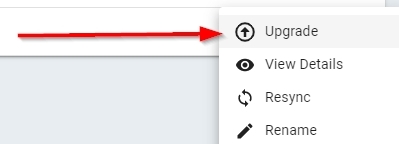
An icon will also be visible in the Application list:
You can find out more about this in Application and schema upgrade using AIP Console. |
|---|
| View details | This will take you to the Application details screen where you can view information about the Application. |
|---|
Resync | The Resync option will resolve a desynchronization between the Node and Console and will bring Console back up-to-date. This option should be used in the following situations: - When you have run an Application and schema upgrade on the Application's parent Node.
- When you have performed an action in the CAST Management Studio: currently Console does not contain every single option and setting that is available in CAST Management Studio, as such it is sometimes necessary to use CAST Management Studio on a Node to perform one of these actions.If you need to perform any of the following actions in CAST Management Studio, Console will become "desynchronized" because it does not know what has been done:
- run a new analysis/generate a new snapshot
- change any setting or option in CAST Management Studio which has an equivalent in Console
- delete an existing snapshot
|
|---|
| Rename | Option to rename the Application. Note that when using Console ≥ 2.2 AND when a Named Application license key scope has been chosen in Complete start-up wizard - v. 2.x, a License Key field will be displayed in the rename dialog box - you must ensure that a new Named Application license key for the renamed application is entered into this field: 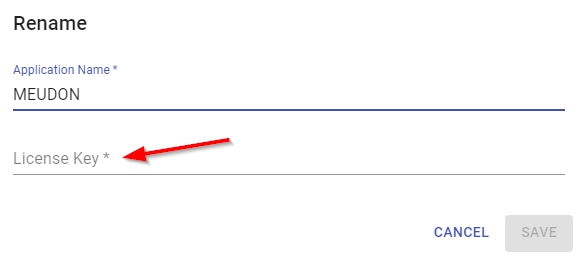
|
|---|
| Change Domain | Option to change the Domain to which the Application has been assigned. Note that you can change domains for multiple applications (in Console ≥ 2.5) using the icon. |
|---|
| Manage User Roles | Option to assign resource roles for the specific Application. |
|---|
| Optimize | Over time and through continued use, the efficiency of your Application schemas (Analysis, Dashboard and Management) may well start to degrade ("gaps" in table data, inefficient indexes etc.) - this degradation can significantly impact performance, with the most visible impact seen in the performance of the CAST Dashboards. To counter this, CAST provides a feature (known as CssOptimize) that can be run manually to optimize the Application schemas stored in the Application's associated PostgreSQL instance - i.e. to clean up defects that have appeared over time. Click the button and choose the action you require. The optimization action will run immediately: 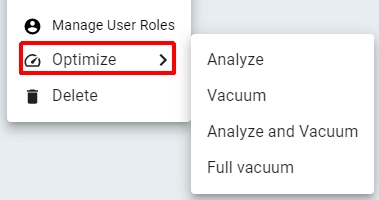
|
|---|
| Delete | Option to delete the Application. When an Application is deleted, the Application's delivery / deploy folders and all Application schemas stored on the PostgreSQL instance will be deleted. - If you want to retain the Application schemas in their target PostgreSQL instance, ensure you tick the Keep data in CSS option.
- If you want to retain any backup/Sherlock data on disk related to the application (see the Backups and CAST Support (Sherlock) sections in Administration Center - Applications - Application Details for more information about where the files are stored), ensure you tick the Keep backup files/data option.
|
|---|
|
|---|