Introduction
You will need to run the installer on each Node instance (i.e. a machine on which AIP Core is already installed) that you want to manage with Console.
To run the setup, local Administrator privileges are required.
GUI installation
To start the installation, double click the executable JAR file as provided with the installation media. If you are unable to execute the .JAR file, use the following command to open the JAR in GUI mode:
≥ 2.x
java -jar AIP-Node-<version>.jar

1.x
java -jar AIP-Console-<version>.jar
You can run the above command in the Command Prompt window (CMD) - ensure you launch the CMD window with elevated permissions (run as administrator).
The next steps depend on the release you are using:
v. 2.x
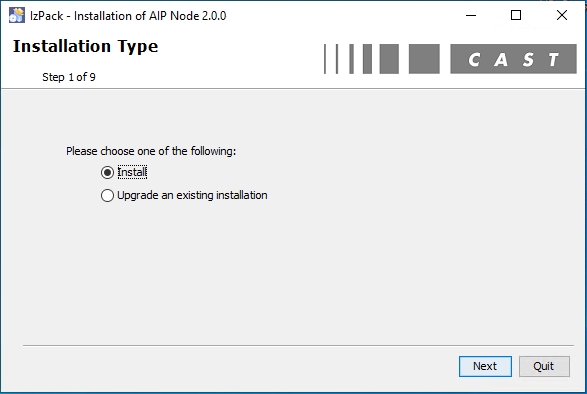
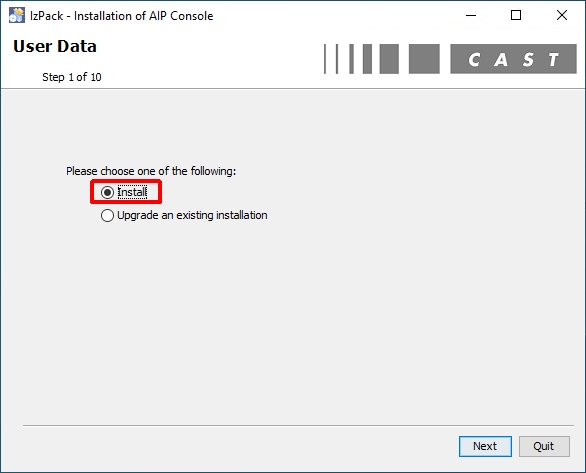
Step 1
The installation wizard will be displayed:
- If the wizard cannot locate a previous 2.x installation of the Node service in the default installation location or in the Window Registry, then the Install option will be automatically selected.
- If the wizard locates a previous 2.x installation of the Node service in the default installation location or in the Window Registry, then the Upgrade an existing installation option will be automatically selected.
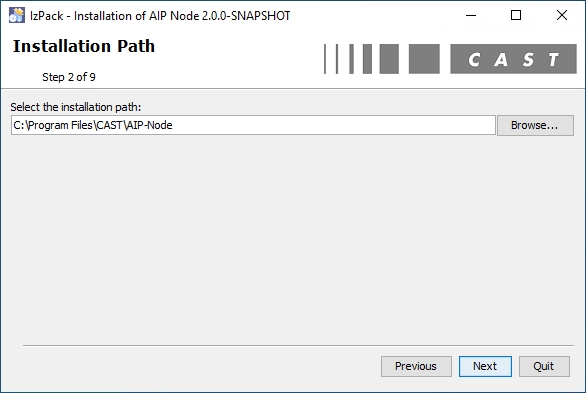
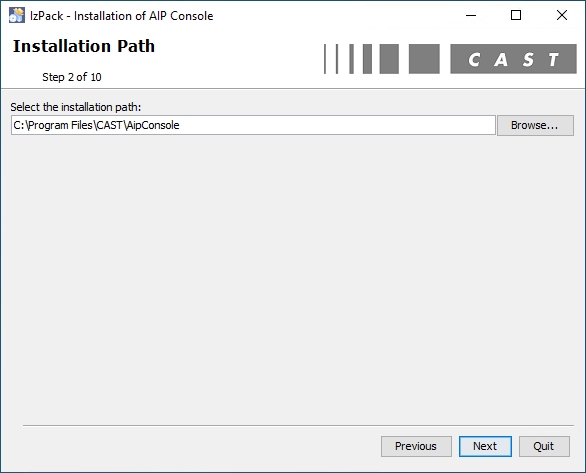
Step 2
Choose a location on the local machine that will be used for the Node service installation. The setup will suggest: %PROGRAMFILES%\CAST\AIP-Node but you are free to choose a different location. If the folder does not already exist, the installation wizard will create it. Click Next to continue:
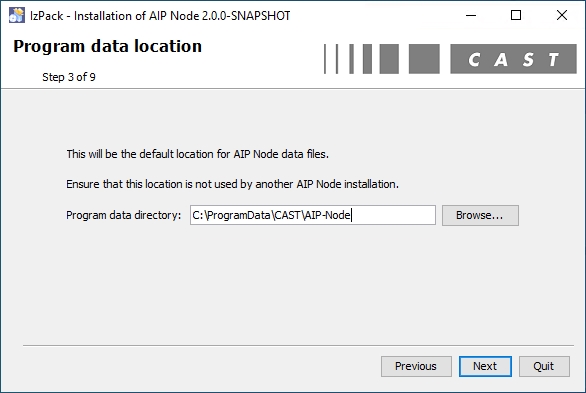
Step 3
Choose a location for your Node "data" - this location will contain items such as Node logs/ExtendCLI configuration items and other non-user specific items such as .properties files. The setup will suggest: %PROGRAMDATA%\CAST\AIP-Node but you are free to choose a different location. The installation wizard will set Full Access permissions on the these folders to all authenticated users:
Step 4
Fill in the information as suggested in the table below:
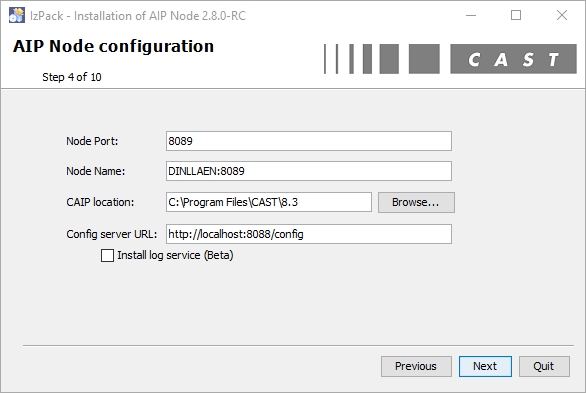
| Node Port (≥ 2.6) | This field defines the port number that the Node service will run on. By default this is set to 8089 and a check will be made by the installer to ensure that the port is not currently in use by another service. You can change the port number if you wish. In older releases, the Node Port option is not available and instead a random port is chosen when the Node service is first started. This port is also dynamic and may change if the service is restarted. |
|---|---|
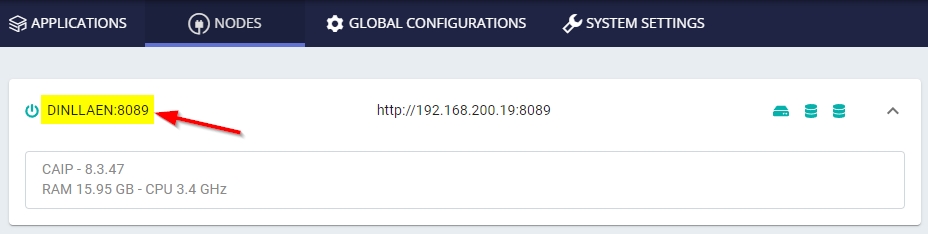
| Node Name / Instance ID | This field defines how the Node instance you are installing will be identified in Console. For example:
≥ 2.6 CAST recommends that you leave this field at the default (which is constructed of the machine hostname and the port 8089), unless you have customised the Node Port number when you may want to change the port number in the instance name (but this is not obligatory and does not affect any communication between the Node and Console). ≤ 2.5 CAST recommends that you leave this field at the default unless you fully understand Spring variables. The default suggestion provided in the installer will produce the following in the list of Nodes in Console: HOSTNAME:PORT |
| CAIP location | Enter the location of the AIP Core installation on the local server. By default this is set to: %PROGRAMFILES%\CAST\<version>. |
| Config server URL | Enter the URL to the Console server, using the port number 8088 unless you have customized this port. This corresponds to the Service Registry service. You can use a FQDN, hostname or IP address, for example:
|
| Install Log Service | See Log Service installation. |
Step 5
Fill in the information that is required by the Node service with regard to the Windows Service. Click Next to continue:
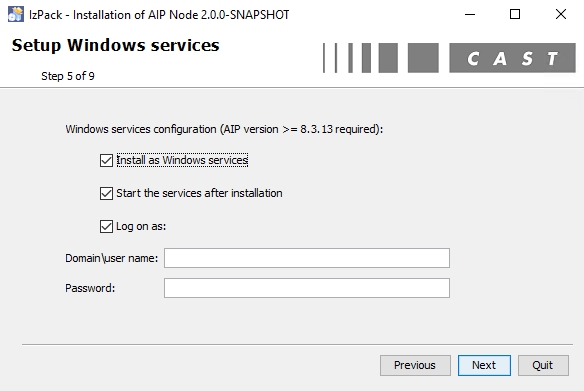
| Option | Description | |
|---|---|---|
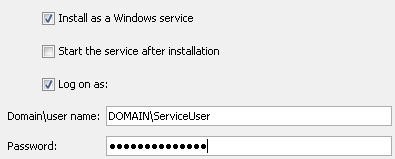
| Windows Service | Install as a Windows Service | When ticked (default position), this option will install the package as a Windows Service so that you can more easily stop and start the package. Note that:
|
| Start the service after installation | When ticked (default position) the Windows Service will be started after it is installed (recommended). | |
| Log on as | By default, this option is ticked, therefore you should fill in Service User account credentials that will be used to run the service:
If you untick the option, the Local System account will be used to run the service, however, CAST does not recommend this and a warning will be displayed when you click Next:
CAST highly recommends that the Local System account is not used to run the Windows Service. This is particularly true if:
In both these situations, the user running the Windows Service will be used to access the proxy/shared network resources. Instead CAST recommends using the login credentials that match the log in used to install AIP Console/AIP Node/AIP Core/set system proxy settings etc. - for example, this could be a specific "service account" that is created specifically for installing and running AIP Console/AIP Nodes/AIP Core/setting system proxy settings. This service account would also therefore have access to the shared network resources and would be able to use the system proxy settings. | |

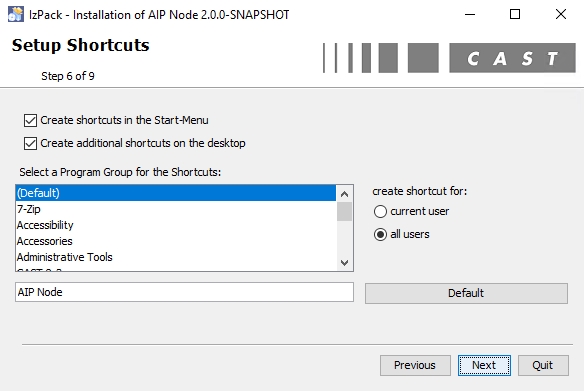
Step 6
Choose whether to create shortcut icons and Start menu entries for the Node service. The installation will start when you click Next:
Step 7
The installation process will start. Click Next when complete:
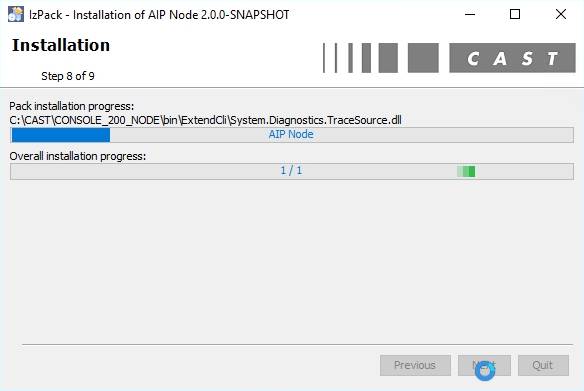
Step 8
The installation process is complete:
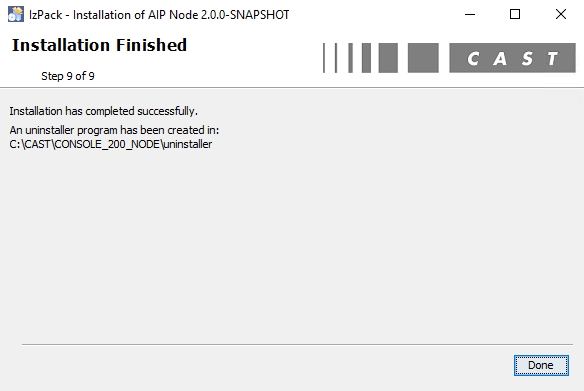
If your Node has multiple network interfaces and therefore may have multiple IP addresses at any one time, you may wish to make a manual change to a properties file to ensure that the Node registers itself with CAST Console using its hostname rather than its IP address (which may change or become disabled). See Configuring Nodes with multiple IP addresses to register with a hostname.
v. 1.x
Step 1
The installation wizard will be displayed:
- If the wizard cannot locate a previous installation of the Node service in the default installation location %USERPROFILE%\CAST (Windows),%PROGRAMFILES%\CAST\AipConsole (Windows), $HOME\CAST\AipConsole (Linux) or in the Window Registry (if installing on Windows), then the Install option will be automatically selected.
- If the wizard locates a previous installation of the Node service in the default installation location %USERPROFILE%\CAST (Windows),%PROGRAMFILES%\CAST\AipConsole (Windows), $HOME\CAST\AipConsole (Linux) or in the Window Registry (if installing on Windows), then the Upgrade an existing installation option will be automatically selected. In this case:
- If you do not want to update the existing installation, ensure you choose the Install option and proceed with a "clean installation" in a different installation location.
- If you want to upgrade the previous installation, please see Upgrade AIP Console.
Click to enlarge
Step 2
Choose a location on the local machine that will be used for the Node service installation. The setup will suggest: %PROGRAMFILES%\CAST\AipConsole but you are free to choose a different location. The service will be installed in a sub-folder called AipNode. If the folder does not already exist, the installation wizard will create it. Click Next to continue:
Step 3
Choose a location for your Node "data" - this location will contain items such as logs/delivery/deploy/upload/backup and other non-user specific items such as .properties files. The setup will suggest: %PROGRAMDATA%\CAST\AipConsole but you are free to choose a different location. A sub-folder called AipNode will be created to store the data items relating to the Node service and the installation wizard will set Full Access permissions on the these folders to all authenticated users:
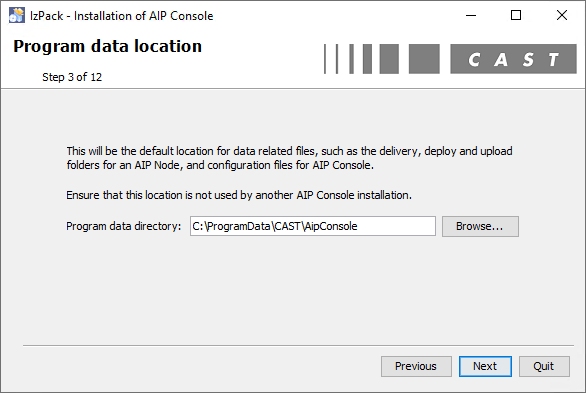
In previous releases of Console, all these items were stored in <installation_location>\AipNode\data. You can modify the locations of the delivery, deploy, upload and backup folders when the installation is complete and before onboarding your first Application (recommended). See Configure AIP Node storage folder locations - optional - v. 1.x.
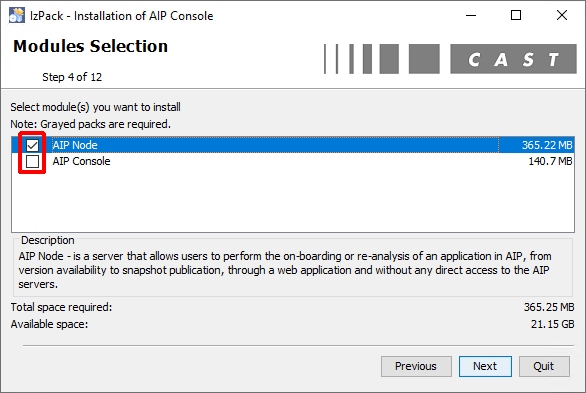
Step 4
Choose the installation services you require - in this example we are installing only the Node service (untick the Console service). Click Next to continue:
If the installation wizard detects a previous installation in Step 1, and you have chosen the Install option, and you choose to install to the existing installation location, a check will be made to ensure the following folders are empty when you click Next:
- %PROGRAMFILES%\CAST\AipConsole\AipNode
- %PROGRAMDATA%\CAST\AipConsole\AipNode
The solution for both errors is to choose a different location for the installation by returning to Step 2 using the Previous button in the installation wizard.
Error 1

Error 2

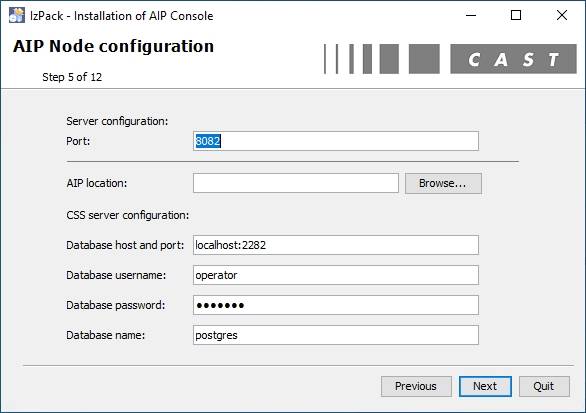
Step 5
Fill in the information that is required by the Node service with regard to the port used, AIP Core location and PostgreSQL options. Click Next to continue:
| Option | Description | |
|---|---|---|
| Server configuration port | This port will be pre-filled with 8082. This is the port number which the AIP Console package will use to communicate with the API Node package. If the port is already being used by another service, you can choose another custom port. If you would like to use a secure https port, please choose a non-secure port for the initial installation process and then change it post installation (see Changing Console and Node port numbers - activating HTTPS). | |
| AIP location | Enter the location of the CAST AIP installation on the local server. This will normally be: %PROGRAMFILES%\CAST\<version>. | |
| Database host and port | Enter the hostname/IP address and port number of the PostgreSQL instance that this AIP Node will use for the CAST schema "triplet" required for each Application managed on the AIP Node (Analysis, Dashboard, Management schemas). This PostgreSQL instance can either be installed on the local server or a remote server. The field will be pre-filled with localhost:2282, which assumes a CAST Storage Service 3 installed on the local server. | |
| Database username | Enter the credentials for the PostgreSQL configured in the Database host and port field. The login and password fields will be pre-filled with the default credentials: operator/CastAIP. These credentials will be encrypted before being stored in a .properties file: <AIP_console_installation>\AipNode\data\aip-node-app.properties | |
| Database password | ||
| Database name | The database name on your target PostgreSQL instance. By default, postgres will be populated, however, if you are using AIP Core ≥ 8.3.40 and wish to store your application schemas in a custom database (i.e. not the postgres database) enter the name of the custom database. | |
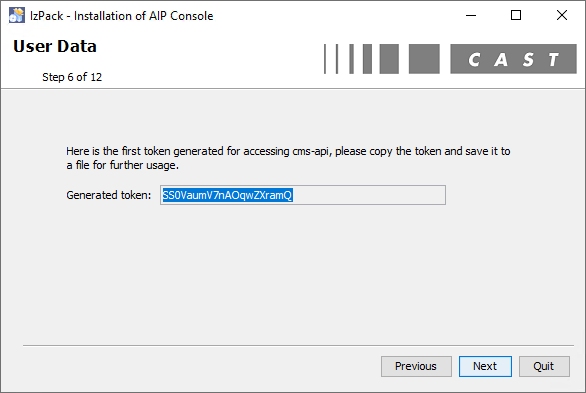
Step 6
The token is then generated: in a multi analysis node installation scenario (i.e. large/enterprise) this token will be required when the AIP Console service is installed, (and also when adding the node to an already installed AIP Console) so take note of it:
Step 7
Fill in the information that is required by the Node service with regard to the Windows Service. Click Next to continue:
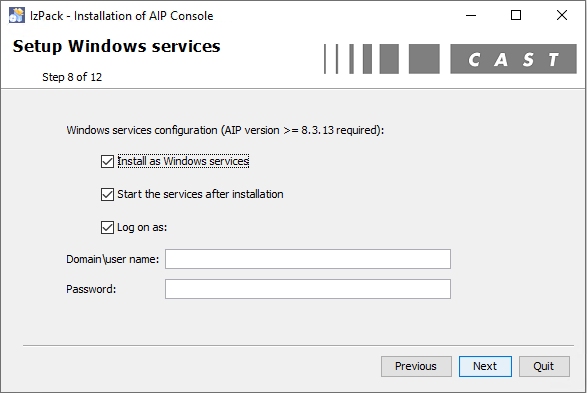
| Option | Description | |
|---|---|---|
| Windows Service | Install as a Windows Service | When ticked (default position), this option will install the package as a Windows Service so that you can more easily stop and start the package. Note that:
|
| Start the service after installation | When ticked (default position) the Windows Service will be started after it is installed (recommended). | |
| Log on as | By default, this option is ticked, therefore you should fill in Service User account credentials that will be used to run the service:
If you untick the option, the Local System account will be used to run the service, however, CAST does not recommend this and a warning will be displayed when you click Next:
CAST highly recommends that the Local System account is not used to run the Windows Service. This is particularly true if:
In both these situations, the user running the Windows Service will be used to access the proxy/shared network resources. Instead CAST recommends using the login credentials that match the log in used to install AIP Console/AIP Node/AIP Core/set system proxy settings etc. - for example, this could be a specific "service account" that is created specifically for installing and running AIP Console/AIP Nodes/AIP Core/setting system proxy settings. This service account would also therefore have access to the shared network resources and would be able to use the system proxy settings. | |
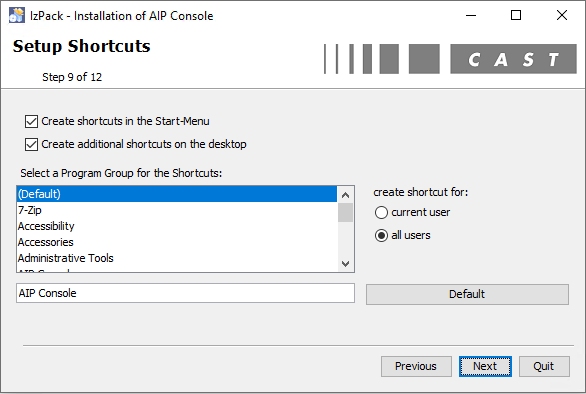
Step 8
Choose whether to create shortcut icons and Start menu entries for the Node service. The installation will start when you click Next:
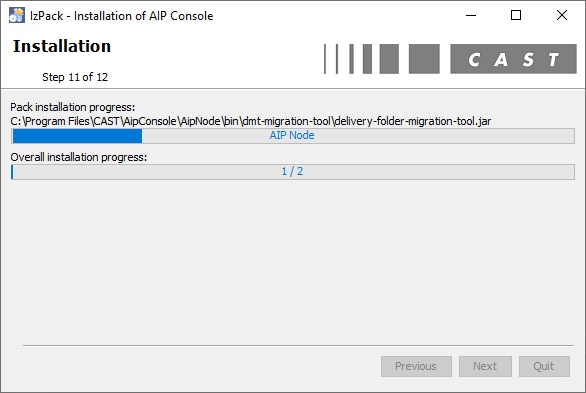
Step 9
The installation process will start. Click Next when complete:
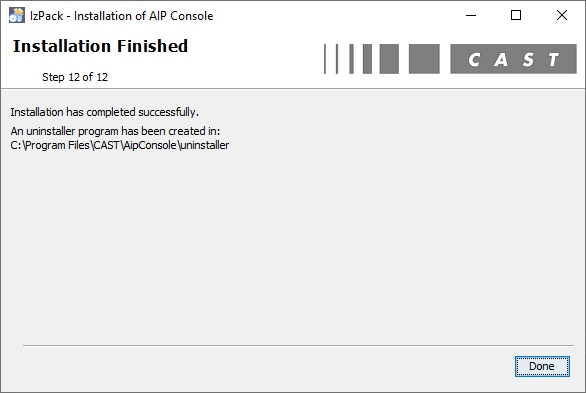
Step 10
The installation process is complete:
CLI console installation
Open a command prompt (for example CMD with elevated permissions (run as administrator)) and move to the location where the executable JAR file as provided with the installation media is stored. Start the installer in console mode by launching the following command:
≥ 2.x
java -jar AIP-Node-<version>.jar -console

1.x
java -jar AIP-Console-<version>.jar -console
The interactive console CLI installer will then start. The steps for the installation process are similar to the GUI installation. Please refer to the GUI installation above for the list of required steps, parameters, default values, etc:
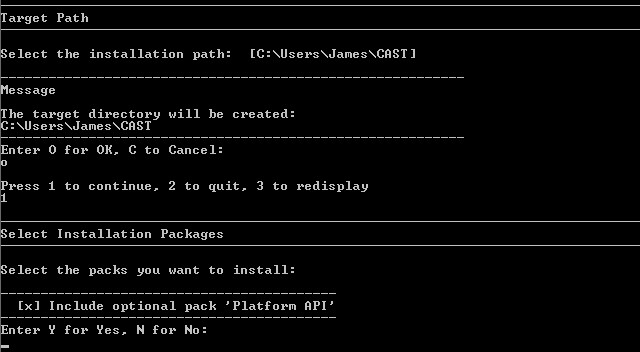
Default values are indicated in square brackets ([like this]) and will be used if the input is not filled with a different value.
If you are installing v 1.x (which has a combined Console and Node installer), ensure you select ONLY the Node service for installation.
Automated (unattended) installation
It is possible to run the installer in unattended mode using predefined settings stored in a specific file - see the instructions below.
Create and configure .defaults files
The first step is to create a .defaults file (you can name this however you want, for example unattended.defaults). This file contains the settings and options that you want to use for your unattended installation. An example is provided below containing all available options for installing the Node service. Please refer to the GUI installation above for an explanation of the available options. Fill in the options to suit your own deployment scenario:
Run the installer with the .defaults file
To run the Console installer in unattended mode, run the following command, changing the .default filename to the one you wish to use:
≥ 2.x
java -jar AIP-Node-<version>.jar -defaults-file unattended.defaults -auto

1.x
java -jar AIP-Console-<version>.jar -defaults-file unattended.defaults -auto
What is installed?
When the installation process is complete, the following will have been installed:
Service
The service will be installed to the location specified in Step 1:
v2.X %PROGRAMFILES%\CAST\AIP-Node
v1.X %PROGRAMFILES%\CAST\AipConsole\AipNode
Data folder
The service will be installed to the location specified in Step 3:
v2.X %PROGRAMDATA%\CAST\AIP-Node
v1.X %PROGRAMDATA%\CAST\AipConsole\AipNode
Shortcuts
If you chose to create a shortcut during the installation it will be created, for example:

Database items
In ≥ 2.x, the first Node service to be installed and started will create a schema called aip_node alongside the aip_config schema in the PostgreSQL instance used by the front end Console services as follows:
- For Enterprise edition front-end deployments using the global Windows installer or the multi-jar installers, the PostgreSQL instance defined during the installation process will be used.
- For Enterprise edition front-end deployments on Docker, the PostgreSQL instance defined in the docker-compose.yml file will be used (i.e. the PostgreSQL instance container deployed directly in Docker).
Any subsequent Node services that are installed will re-use the existing aip_node schema.
Windows Service
The following Windows Services will be created if you enabled the relevant option - and started if you also enabled that option:
| Windows Service name | Auto start? |
|---|---|
| CAST AIP Node Service |

- For a 2.x Node, the service runs on a random port and does not listen for incoming connections (therefore no firewall rules are required).
- For a 1.x Node instance, the service will run on port 8082 and you may need to adjust firewall rules on the server to allow incoming connections on the listening port if this instance is remote to Console.
RAM considerations for Windows Services and startup batch scripts
"Out of the box", the Windows Services and batch scripts made available to run the Node service - which is a Java application - are configured to run with conservative RAM memory allocations as shown in the table below:
| Value | Console ≤ 2.2.0 | Console ≥ 2.2.1 | Details |
|---|---|---|---|
| Xmx value | 1024MB | 2048MB | Maximum memory allocation pool for a Java Virtual Machine (JVM). |
| Xms value | 256MB | 512MB | Initial memory allocation pool for a Java Virtual Machine (JVM). |
This means that even though the host server may have 64GB RAM available (for example), it will only give a maximum of 1GB to the JVM in which the Nodes run. You may therefore find that this is not sufficient and you may receive low memory/out of memory errors when running analyses or snapshots. If this is the case, CAST recommends increasing the Xmx and Xms values until your low memory/out of memory exceptions have been resolved as explained below.
See Configuring RAM for AIP Console front-end and AIP Nodes for more information about changing the RAM allocations.
What next?
See Initial configuration steps.
Troubleshooting
If your Node service fails to start with the following error, you may have misconfigured your storage folders (delivery/deploy/common-data) during the installation of the front-end Console Service Regisitry service:
com.castsoftware.aip.core.utils.FolderCheckException: The path 'S:\delivery' root does not exist.
If that is the case, see the section Optional - Configuration steps to change data folder storage in 2.x - Enterprise mode - Installation of AIP Console front-end via Java JAR installers.